The checklists feature in FacilityBot digitizes checklists. Paper checklists of all types can be easily digitized in FacilityBot starting with a blank template or a checklist template from FacilityBot’s checklist library. The checklists can be set to recur at specified intervals. Responders can easily complete checklists using their web browsers, mobile tablets or through the FacilityBot Mobile App.
Creating a New Checklist
- Log into FacilityBot, go to Settings, and select “Checklists”
- Click on the “+ New” button on the upper right.
Creating a Checklist with a Blank Template
- Click on the “Create From a Blank Template” option.
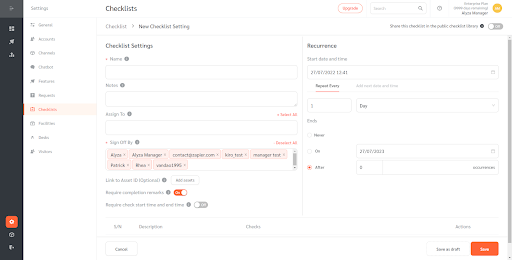
- Enter a checklist name.
- Assign Responder(s) and add notes for the Responder(s) who have been assigned to complete the checklist.
- Select Manager(s) who will be responsible for signing off on the checklist.
- Checklists can also be linked to Assets. Once linked, the status and contents of all checklists linked to the asset can be easily viewed from the Assets page.
Setting Checklist Recurrence
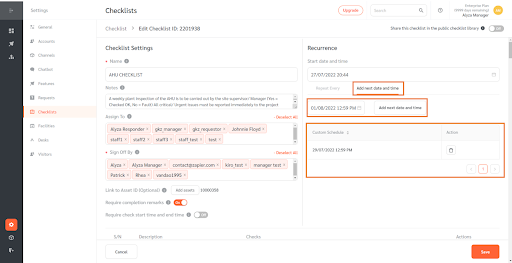
- Checklists can be configured to recur by selecting the start date and time, recurrence intervals (e.g. daily, weekly, monthly, 3 monthly, 6 monthly, 12 monthly), and ending condition using the “Repeat Every” tab.
- FacilityBot also allows checklists to recur based on selected individual dates using the “Add Next Date And Time” tab.
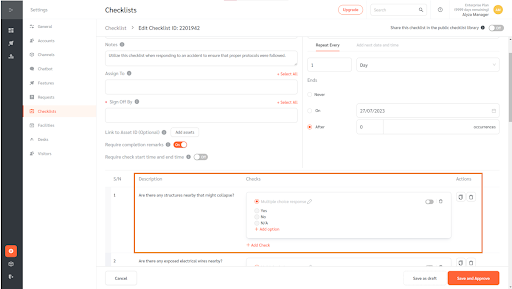
Adding Rows to the Checklist
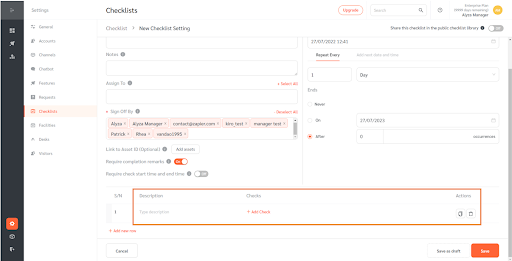
- To add a new row to the checklist, click on the “+ New Row” button.
- Add a description by typing on the description field.
- You can add a new check button by clicking on the “+ New Check”. You have the option to select between various fields including Single Choice Response, Multiple Choice Response, Free Text Response, Image Response, Toggle Response, Date/Time Response, and Signature Response.
- Once done, click on the save button to save the changes
Creating a New Checklist From FacilityBot Template Library
- FacilityBot also allows you to create a checklist using a template from its checklist library.
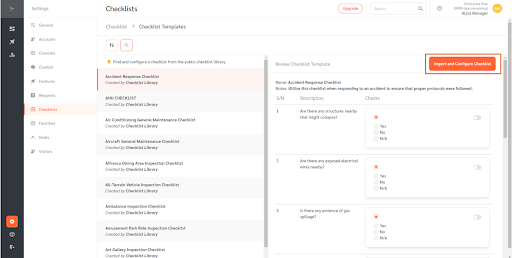
- Click on “Start With A Template From The Checklist Library.”
- On this page, you may select and configure a checklist from the public checklist library.
- Once a template has been selected, click “Import and Configure Checklist.”
- You may configure the checklist by editing the description and check response.
- You may also delete or copy-paste each row.
- Once done, click “Save and Approve.”
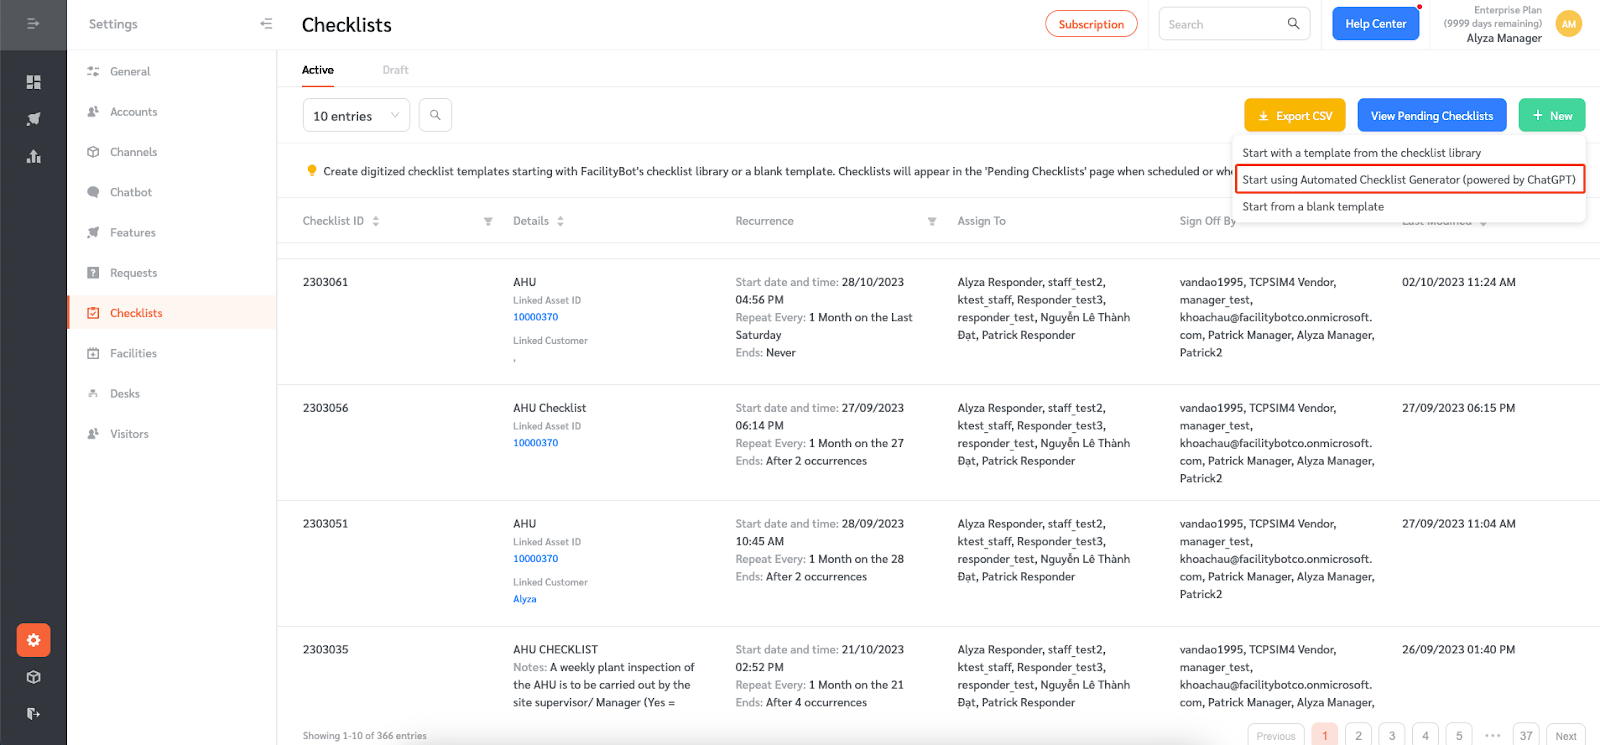
Creating a Checklist Using Automated Checklist Generator
Managers can generate preventive maintenance checklists using Facilitybot’s Automated Checklist Generator feature. This feature is powered by ChatGPT.
- Click on “Start using Automated Checklist Generator by ChatGPT.”
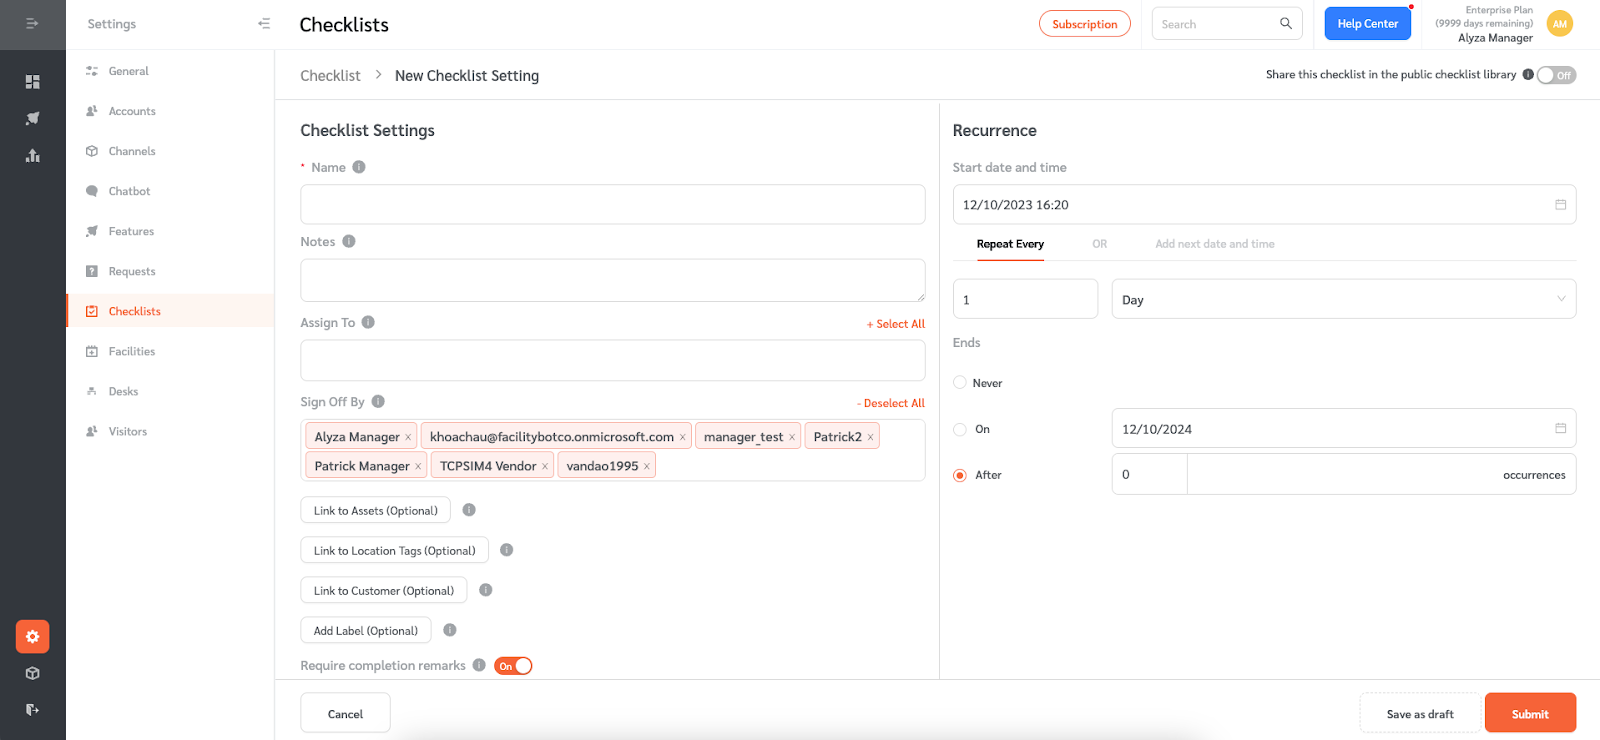
- You will be redirected to a new page to create the checklist.
- Give your checklist a name, enter notes, assign to responders, select the managers allowed to sign off, and set the recurrence setting.
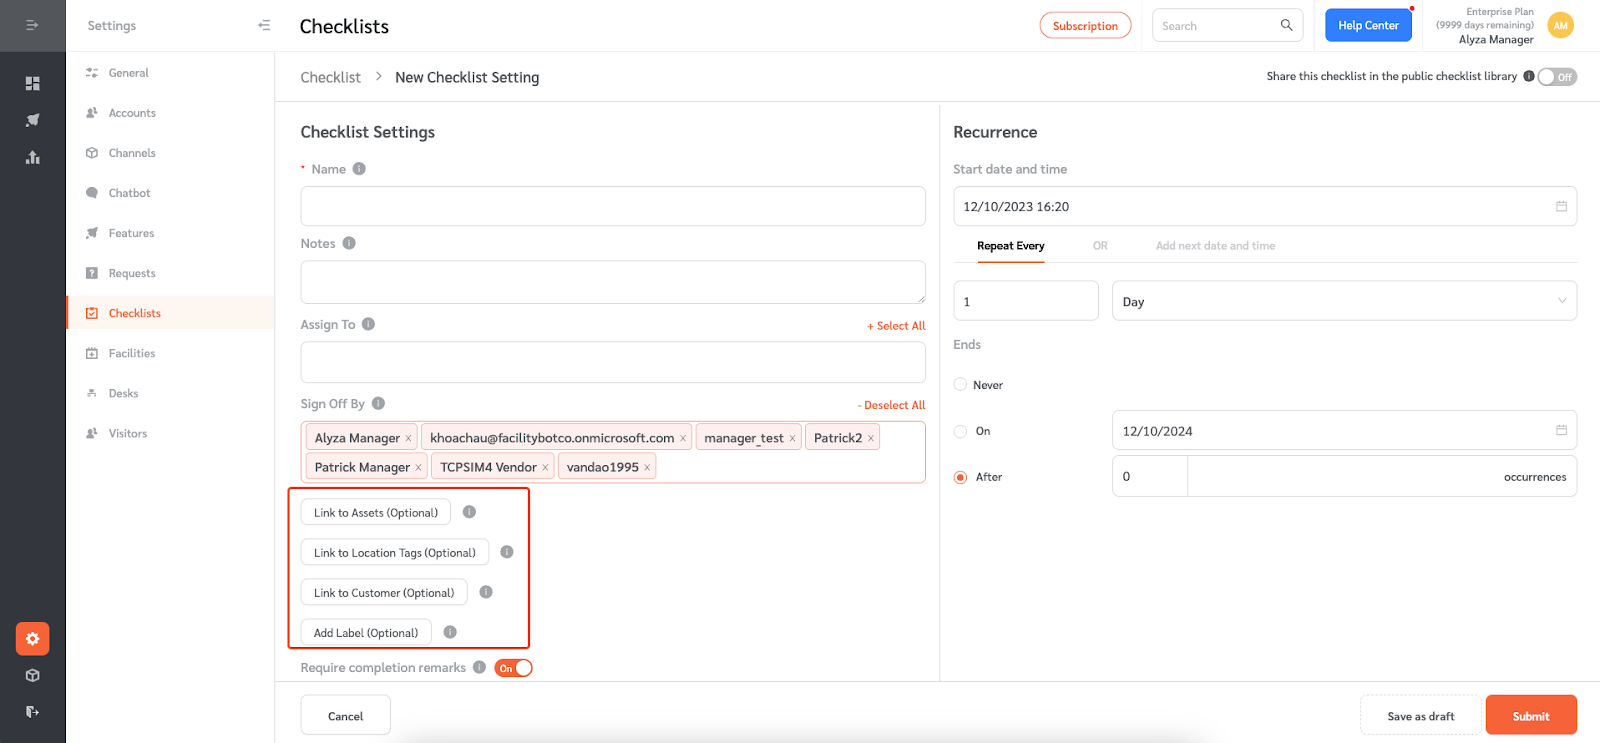
- You may link the checklist to an asset, a location tag, or a customer. You may also add custom labels.
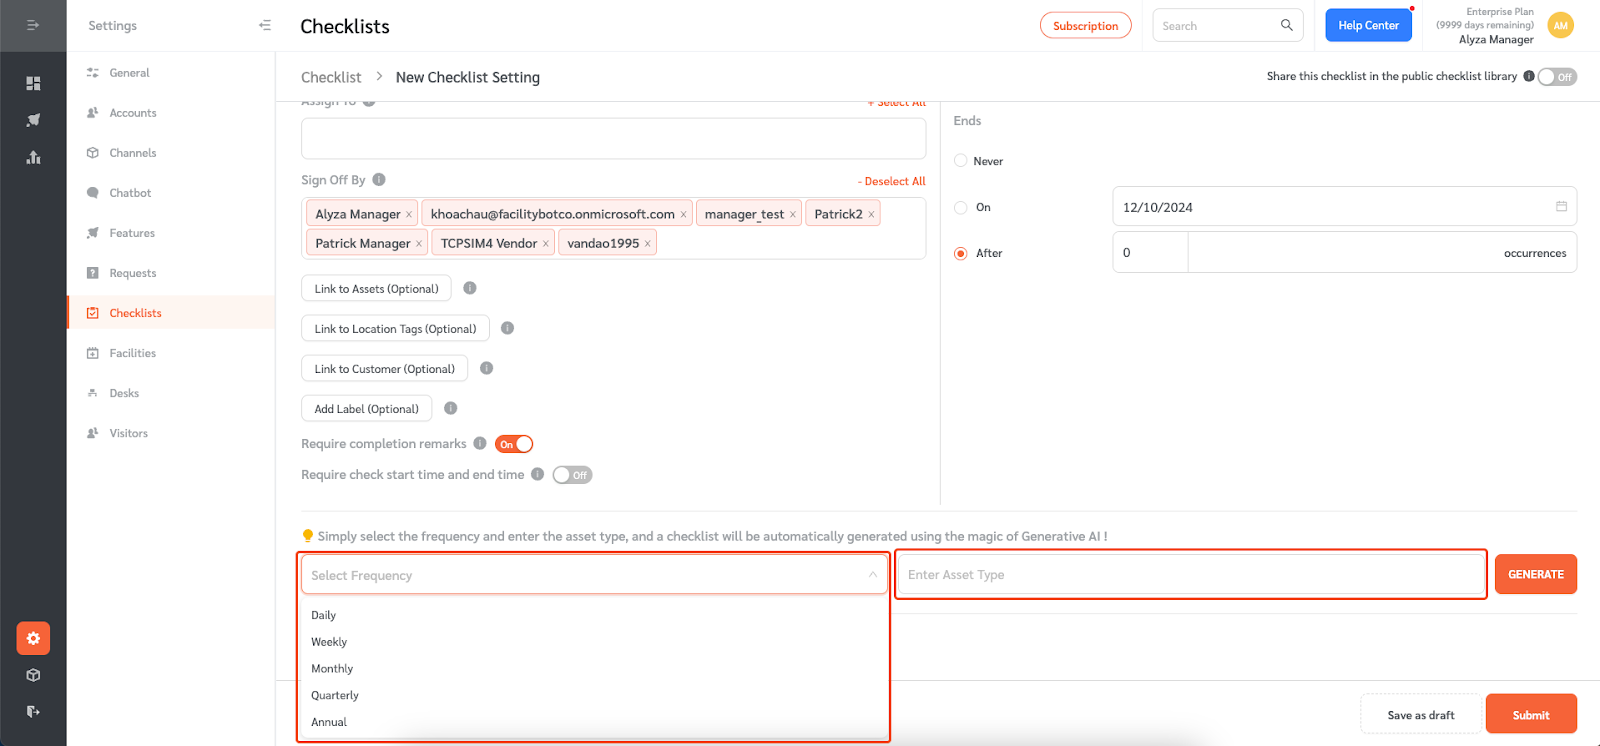
- Scroll down to see the checklist generator
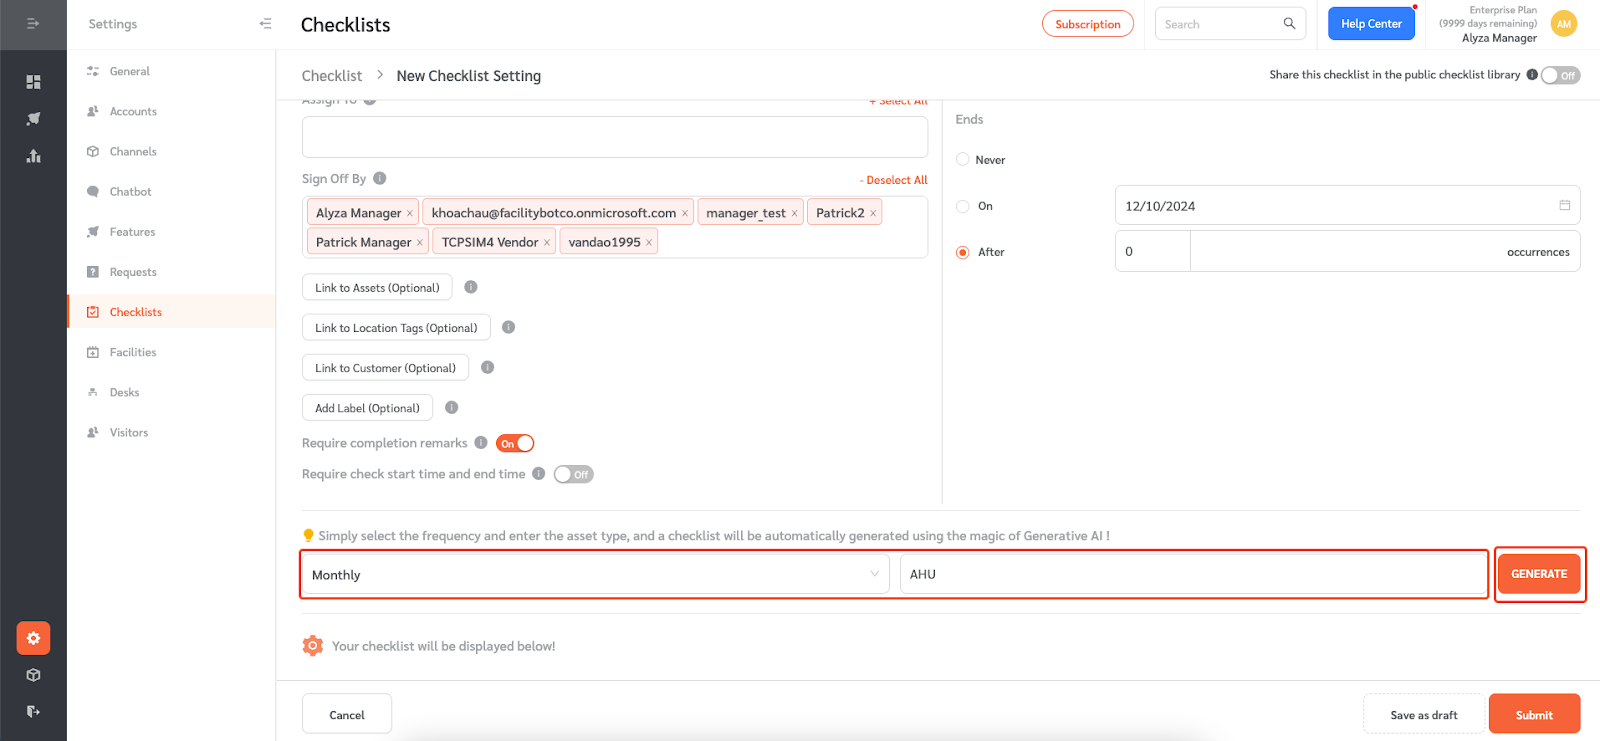
- To create the checklist, select the frequency on the dropdown menu and enter the asset type, and a checklist will be automatically generated.
- Once entered, click “Generate.” Your checklist will automatically be generated.
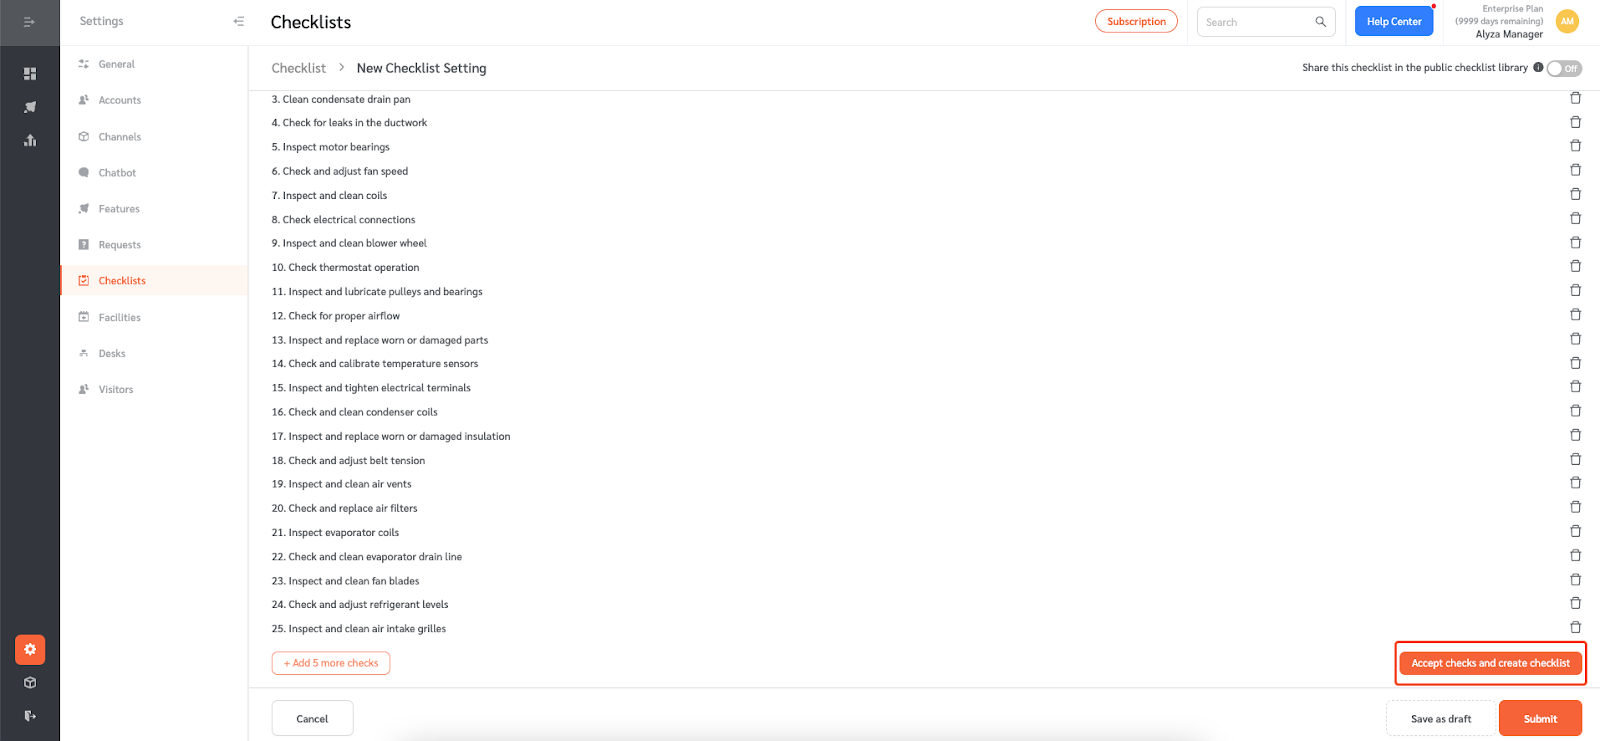
- A preview of the checklist is generated. You may delete items using the bin icon on the right.
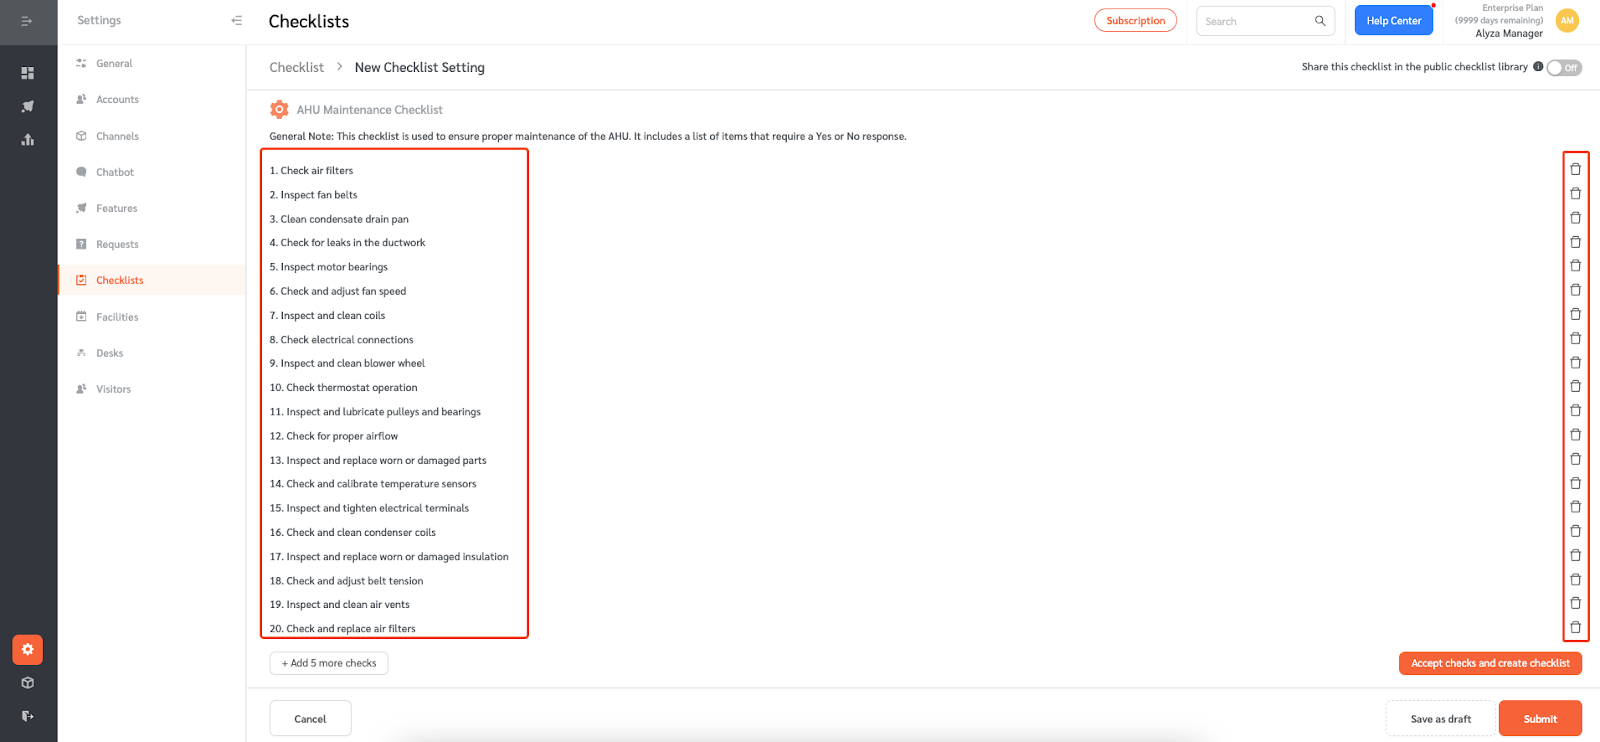
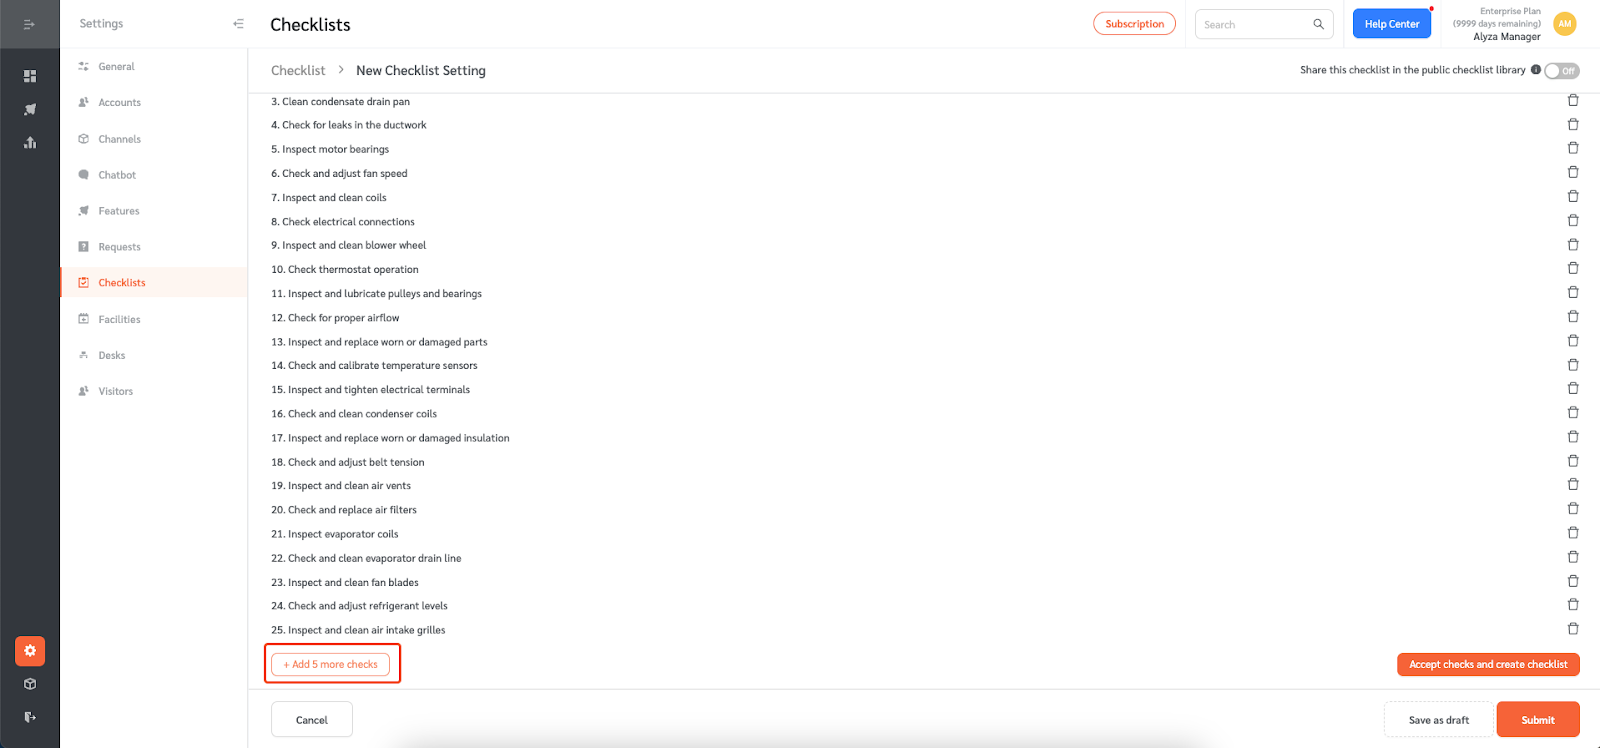
- You can add more rows to the checklists using the “+ Add 5 new checks” button.
- Once you are satisfied with the checklist, click on “Accept checks and create checklist” on the lower right.
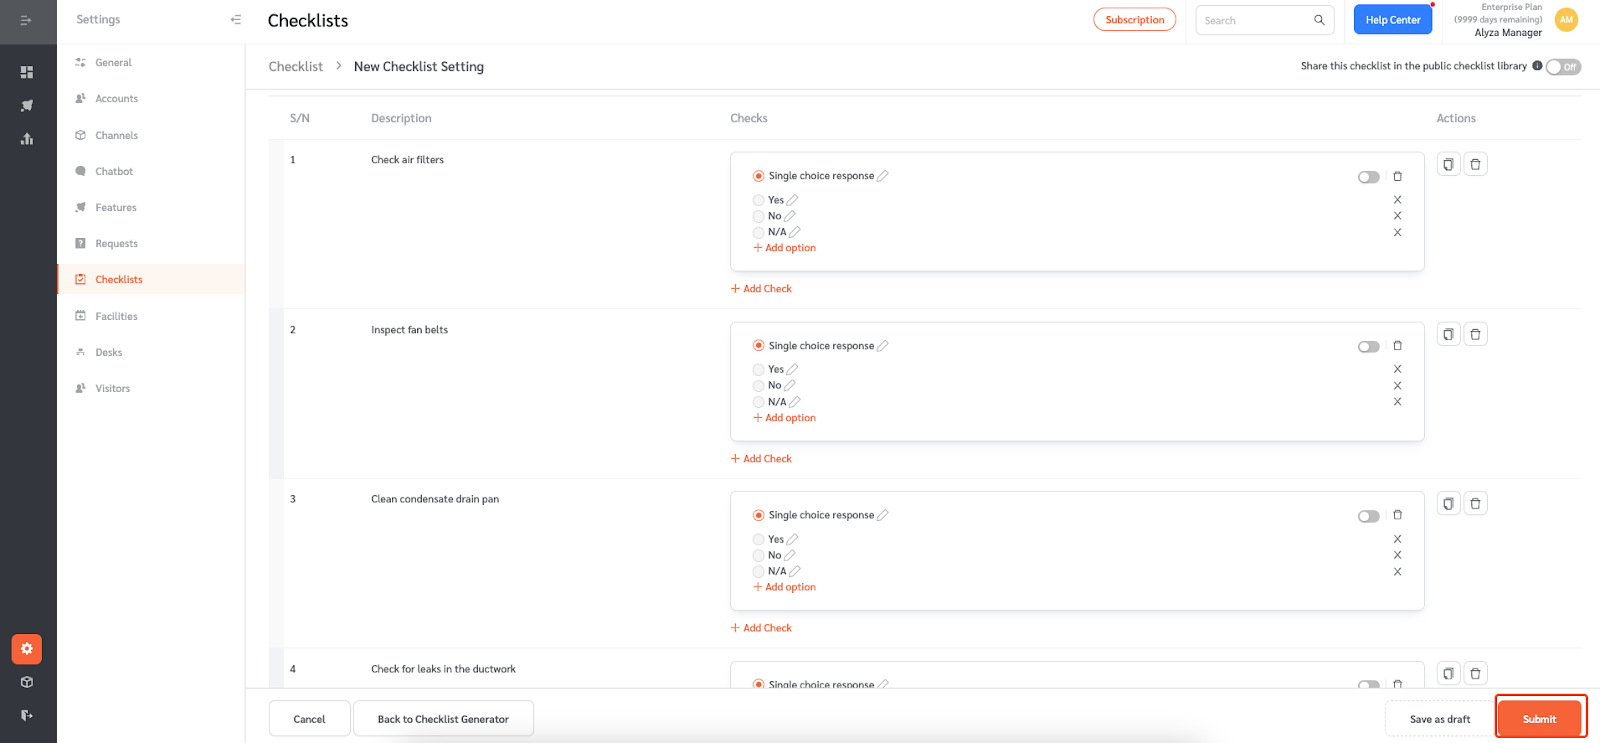
- Your new checklist will be created.
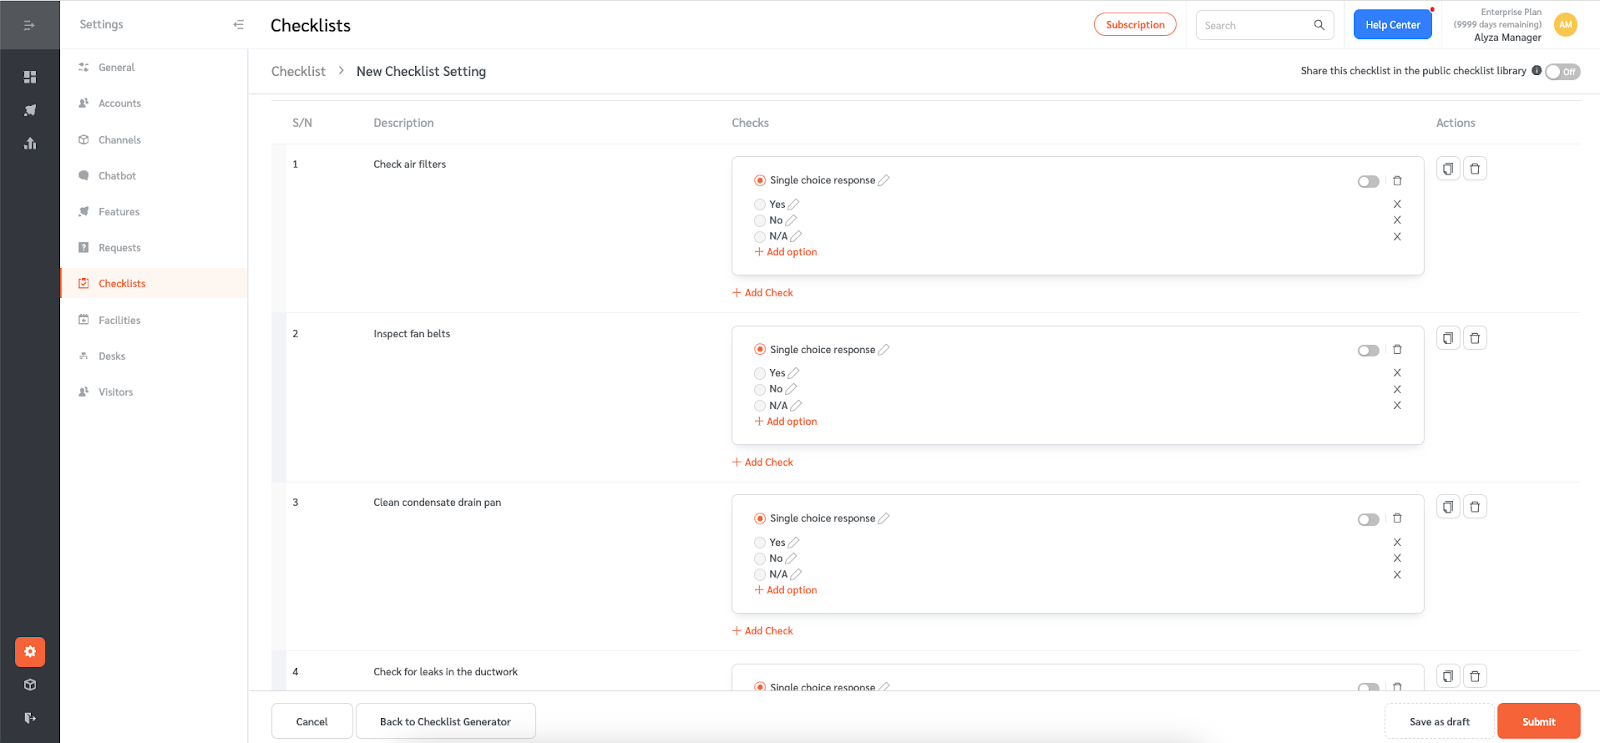
- Click “Submit” to save the changes.
Saving Parent Checklist as Draft
- FacilityBot also allows creating and saving checklists as drafts.
- To do this, create a new checklist using a blank template or one of the templates from the FacilityBot checklist library.
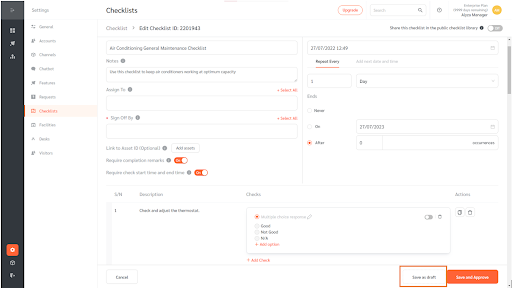
- Configure the checklist by making the necessary edits.
- Once done, click on “Save as Draft.”
- NOTE: Since draft checklists have not been approved, no pending checklists will be generated from draft checklists, even if a start date and recurrence dates have been set for that checklist.
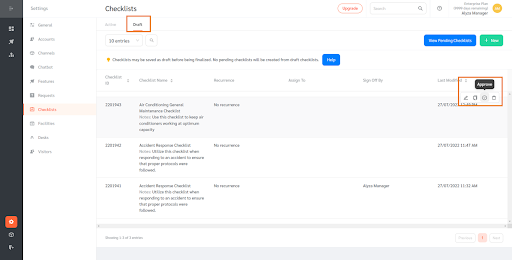
- All draft parent checklists will appear on the Draft section back on the main page.
- Managers may approve, edit, delete or duplicate the draft parent checklist.
- To approve the draft parent checklist, hover on a selected checklist then click on the Approve icon.
Creating Multiple Child Checklists from One Parent Checklist
Facilitybot allows multiple child checklists to be generated from parent checklist for each recurrence date or time. Each child checklist will be linked to an Asset or a Location Tag.
Creating Child Checklist Based on Asset from One Parent Checklist
- To enable this feature, toggle this on. If this toggle is ‘On’, then multiple child checklists will be created at each recurrence date / time. Each child checklist created will be linked to one asset.
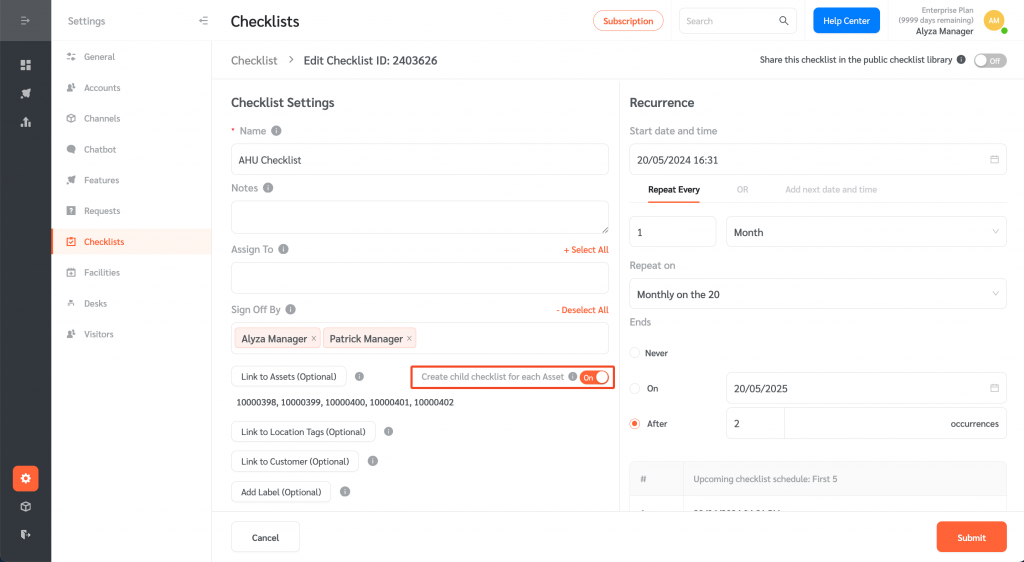
- If the toggle is ‘Off’, then only one child checklist will be created at each recurrence date / time. That child checklist will be linked to all selected assets.
(Note: Even if this toggle is ‘on’, ad-hoc child checklists will be linked to multiple assets.)
Creating Child Checklist Based on Location Tags from One Parent Checklist
- Enable this feature by turning on this toggle. If this toggle is ‘On’, then multiple child checklists will be created at each recurrence date / time. Each child checklist created will be linked to one location tag.
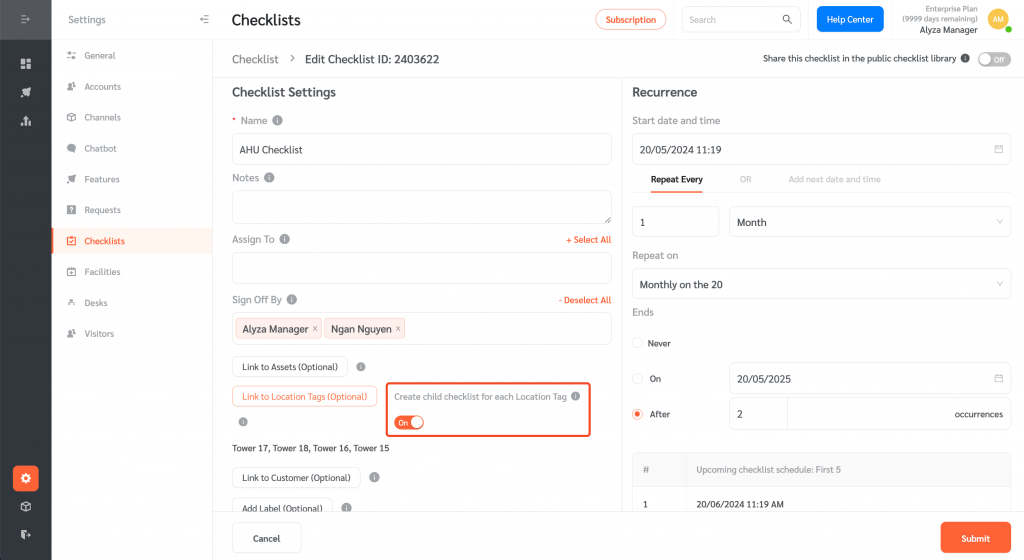
- If this toggle is ‘Off’, then only one child checklist will be created at each recurrence date / time. That child checklist will be linked to all selected location tags.
(Note: Even if this toggle is on’, ad-hoc child checklists will be linked to multiple locations)
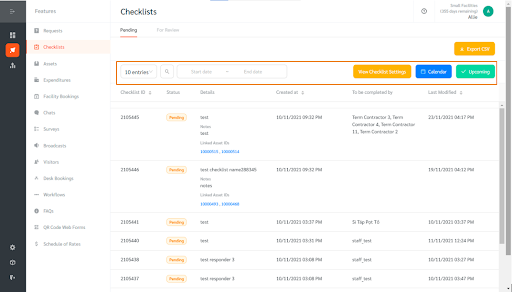
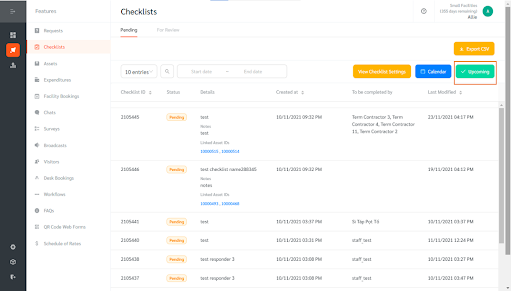
Viewing Pending Checklists
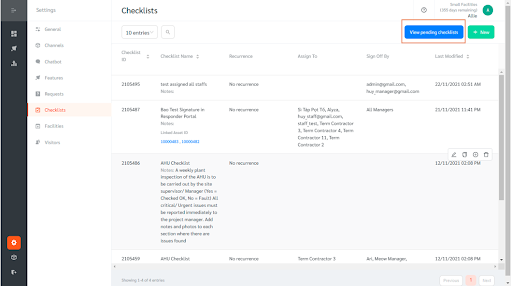
- To view the pending checklists, click on the “View Pending Checklists” button on the upper right located on the main page.
- You may also go to “Features” and select “Checklists” to view the pending checklists.
- A date range filter can be set to easily find a specific checklist.
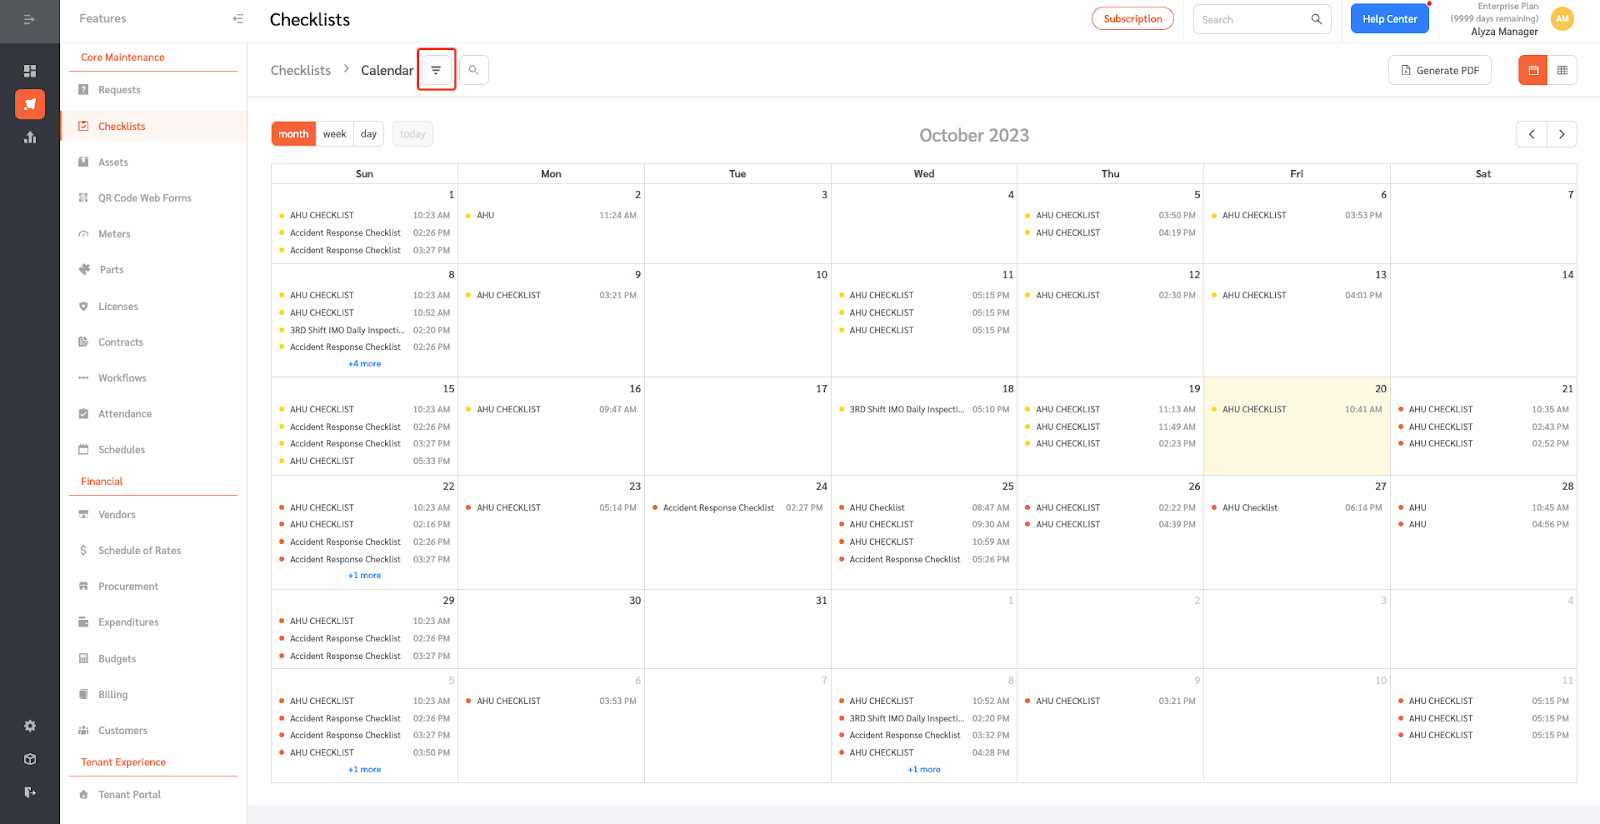
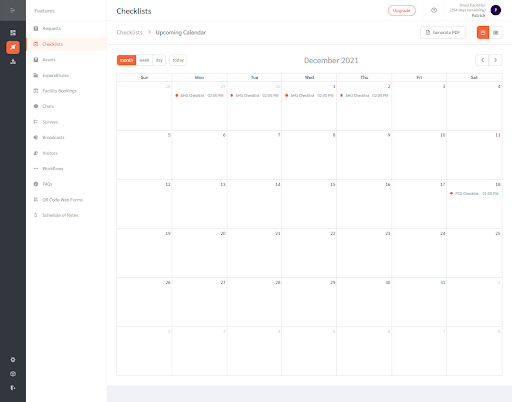
Checklist Calendar
- To view the checklist calendar, click on the Calendar button on the top right.
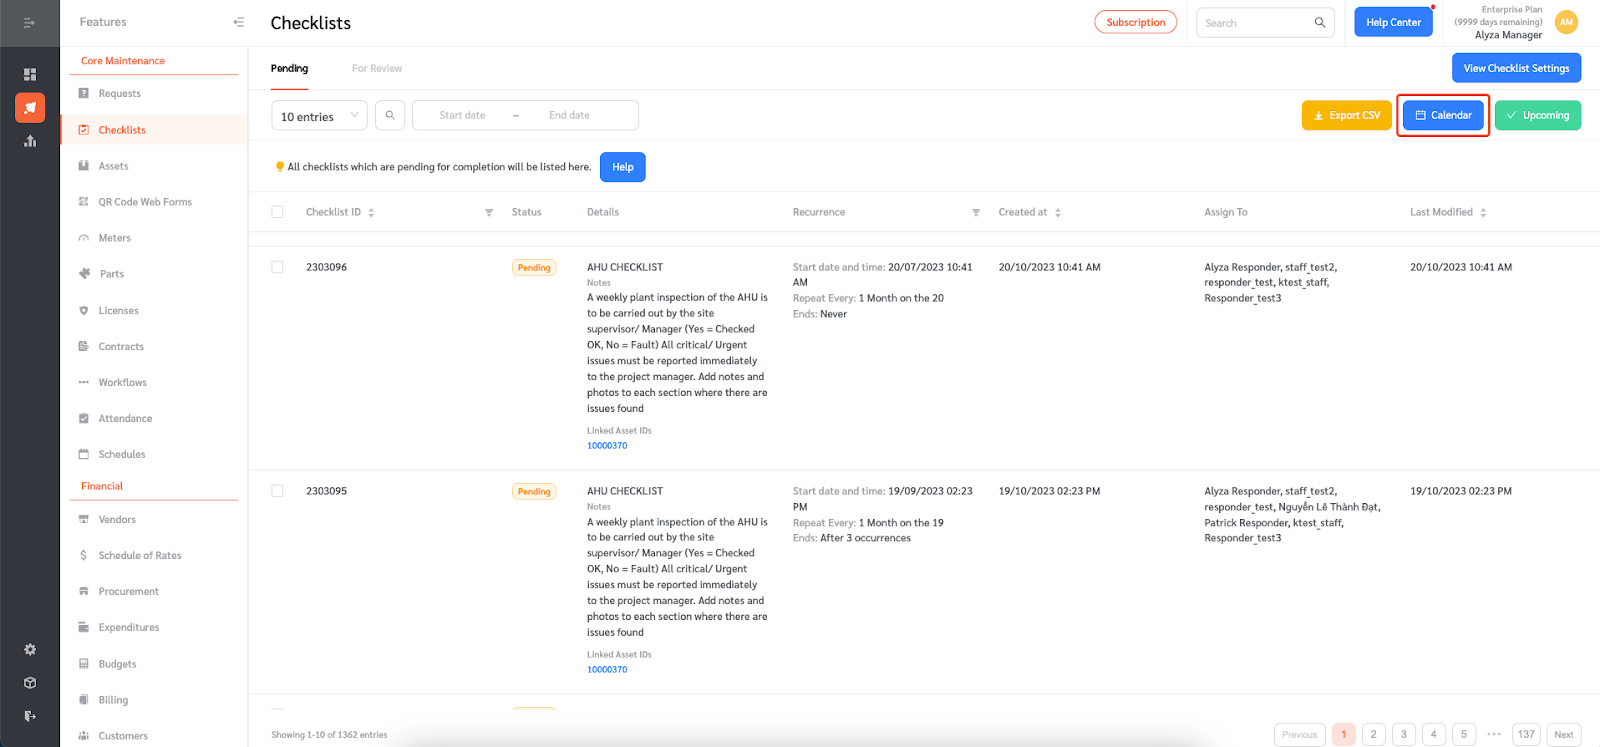
- The page shows your preventive maintenance calendar.

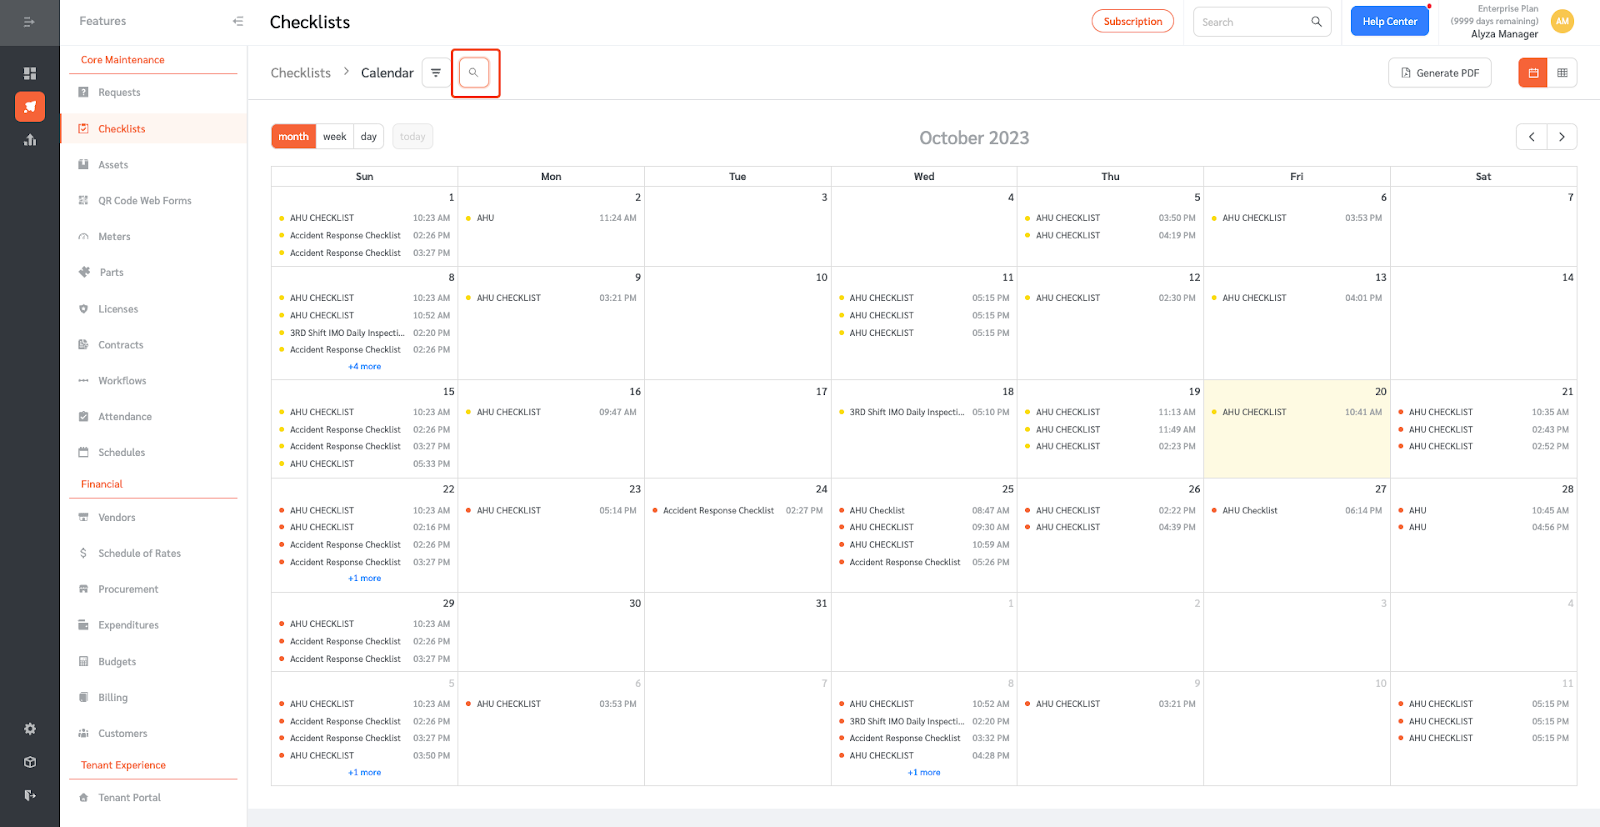
- You can select whether you want to view the monthly, weekly, or daily calendar.
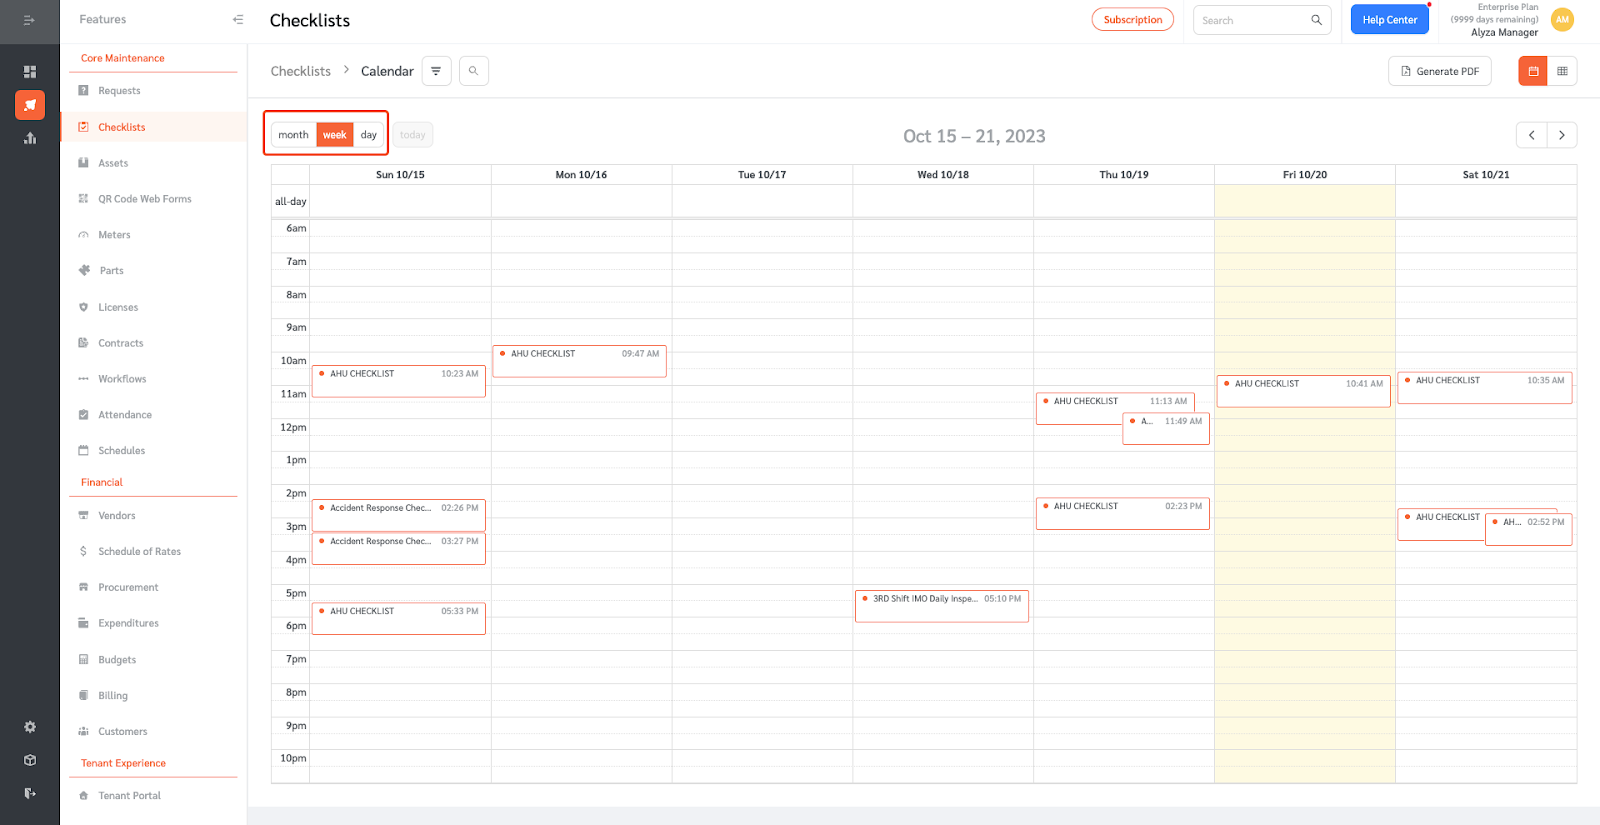
- You can search for a specific checklist on the calendar using the search field.
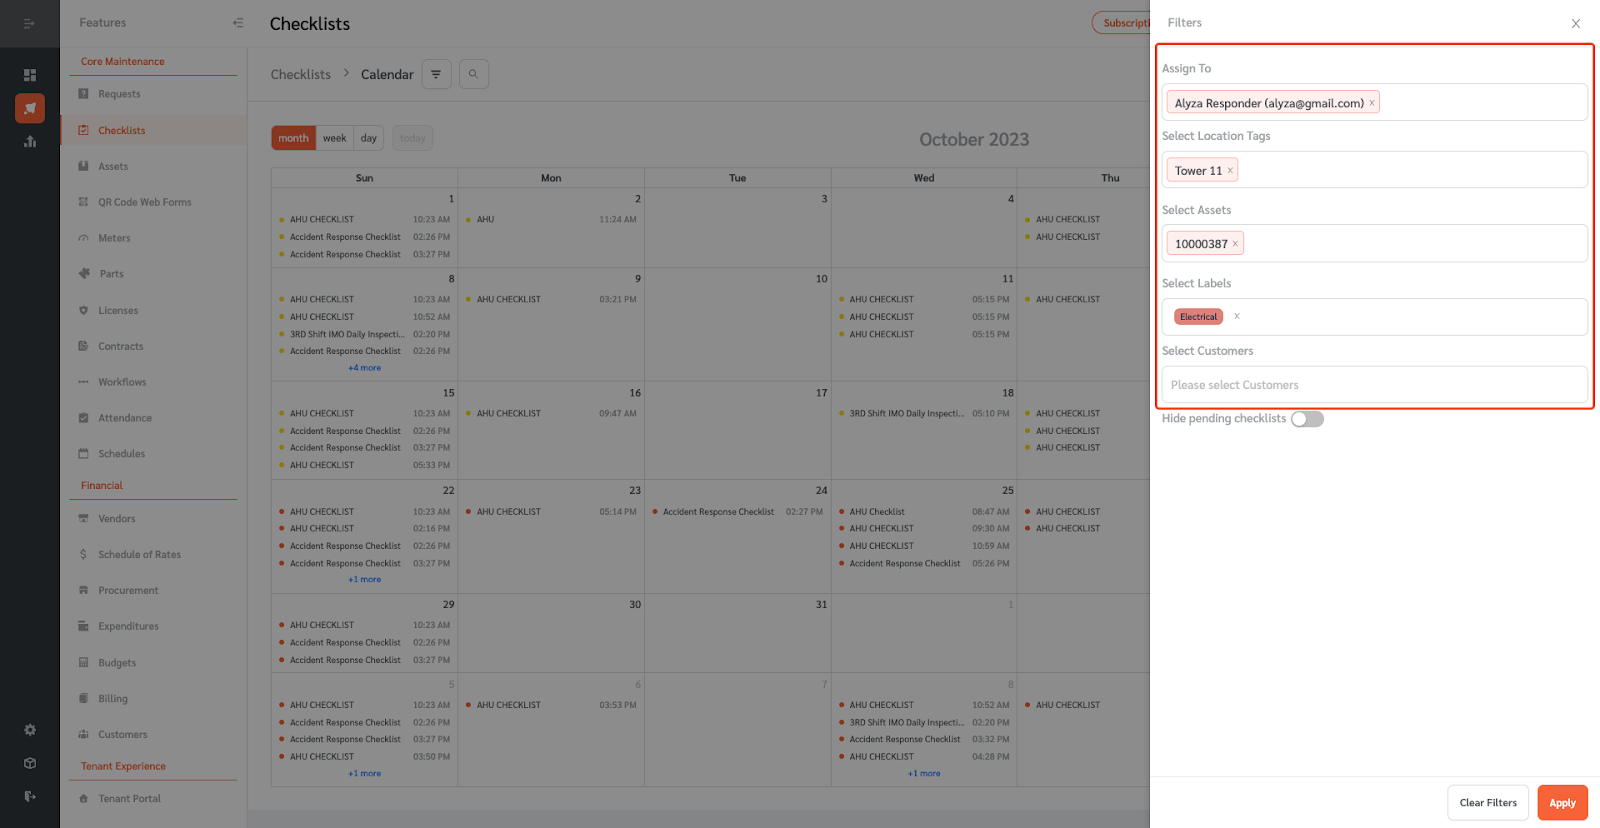
- Filter the calendar by the responders checklists are assigned to, location tags, assets, labels, or customers linked.
- You can also hide pending checklists by turning this toggle to on.
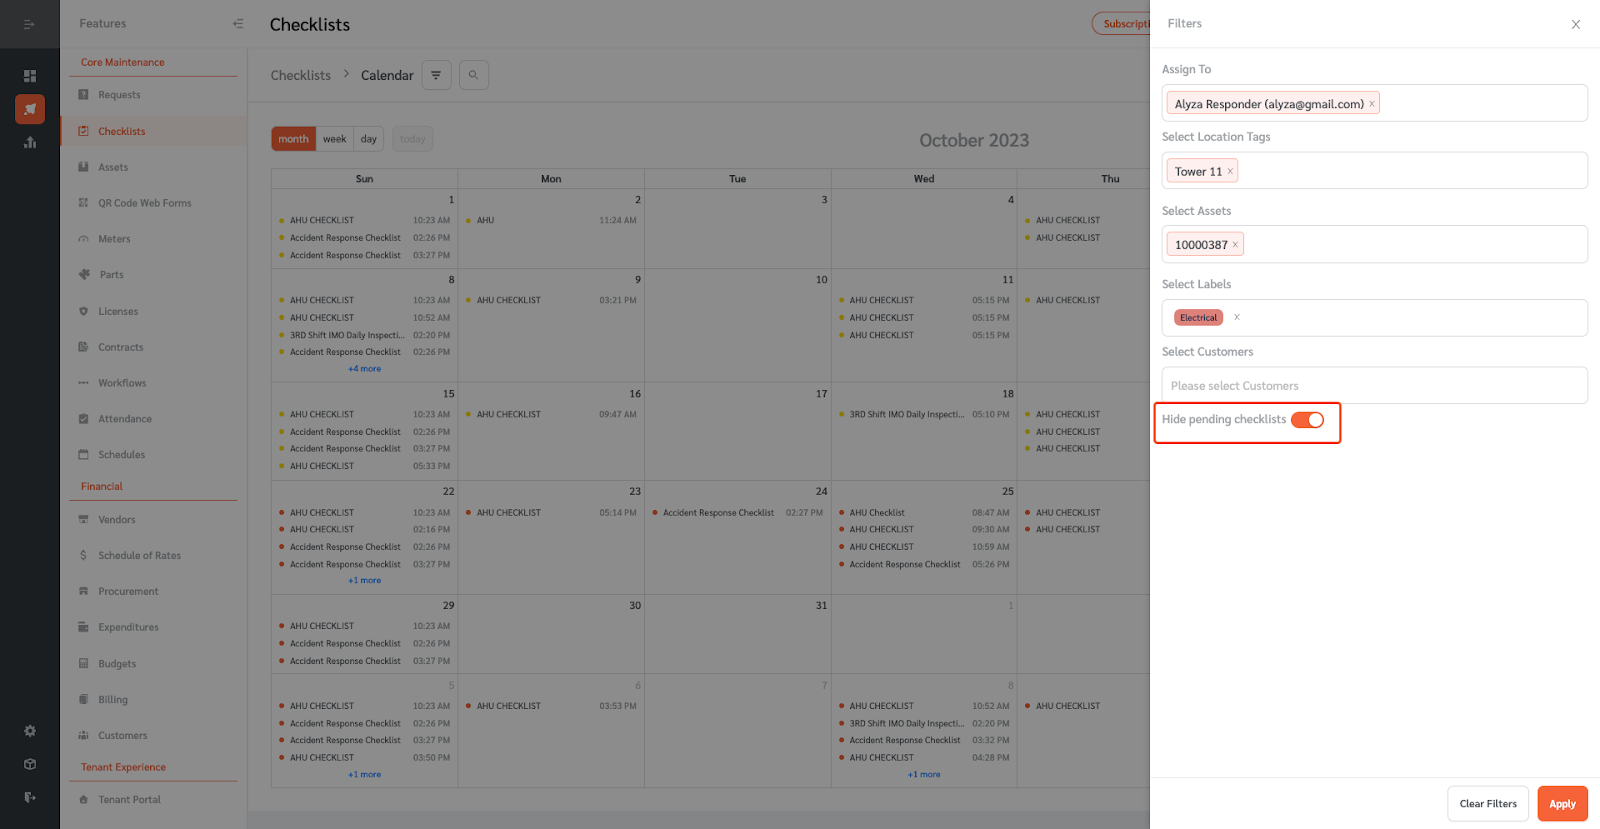
- Once done, click Apply to apply the filter.

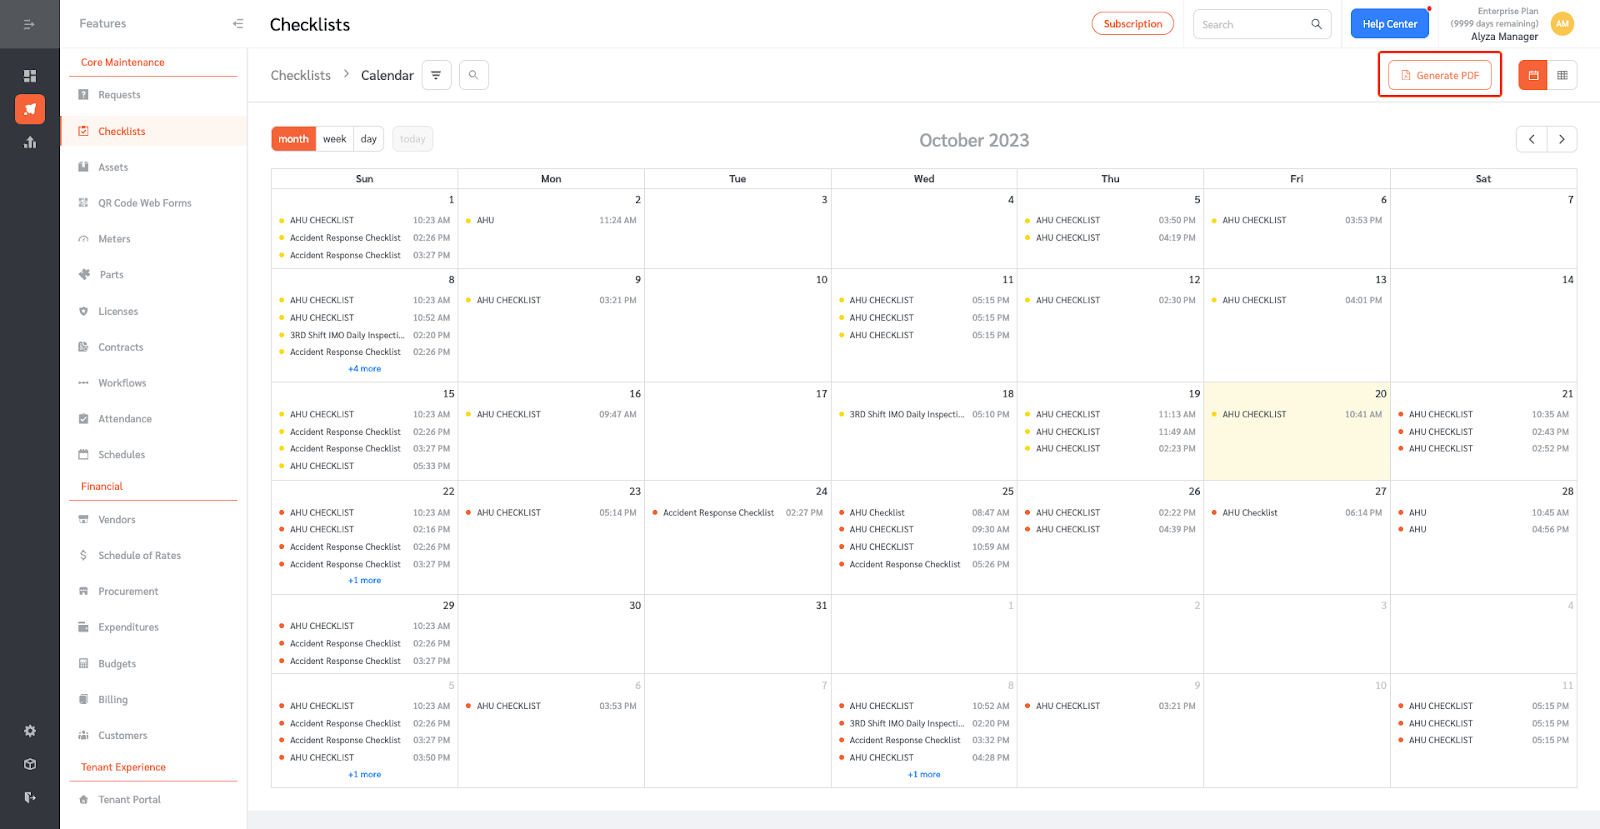
- The checklist calendar can be exported as PDF.
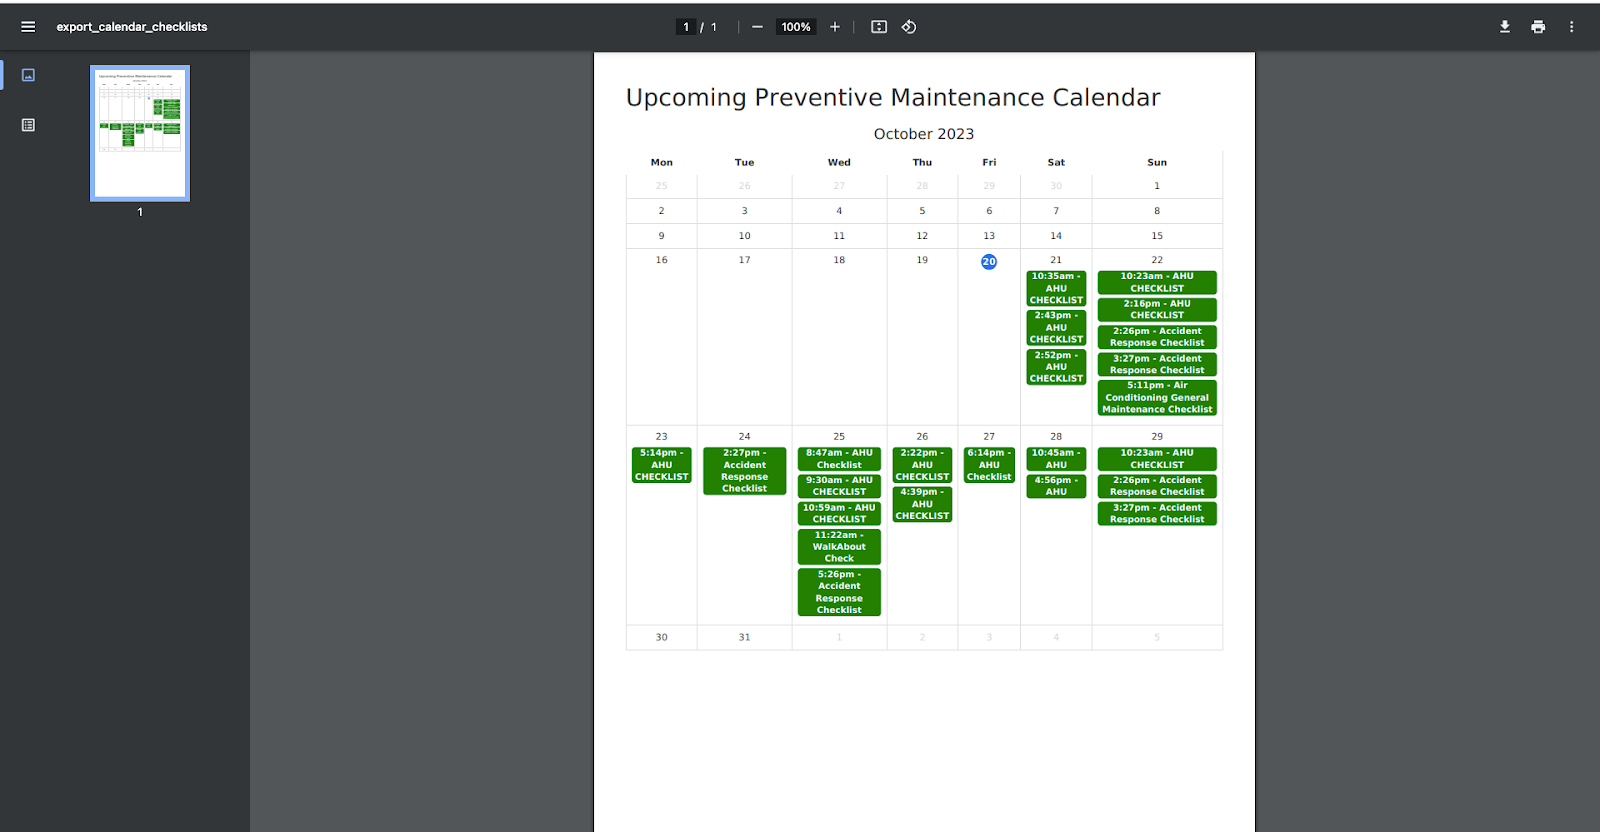
Viewing Upcoming Checklists
- Upcoming checklists can be viewed by clicking on the “Upcoming” button on the far right.
- This gives you the option to view the upcoming checklists on a Calendar view. The checklists can also be generated as a PDF.
- Use the date range field to filter the checklists depending on the start date and end date set.
Completing Checklists
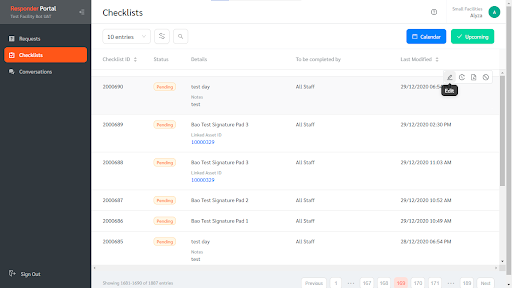
- Log in to FacilityBot Responder or Manager Portal or the FacilityBot Mobile App.
- Click on “Checklists” located on the menu on the upper left.
- Select a checklist to complete.
- Hover on the selected checklist to show the selection tool on the right.
- Click on the pen icon to edit the checklist.
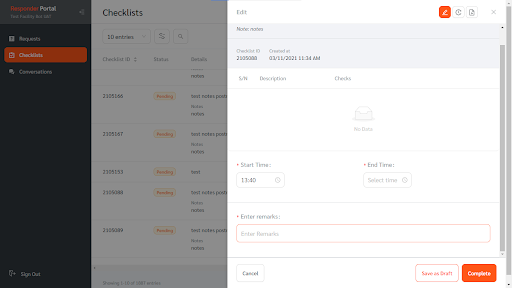
- An editing panel will appear on the right.
- Enter the Start date and End date when the checklist has been completed.
- Add additional notes/remarks if necessary.
- Click on the “Complete” button to save the changes.
Signing Off on Checklist

- Once the checklist has been completed, managers can sign off on the checklist.
- To do this, go to “Features” and select “Checklists”.
- Go to the “For Review” section. The page shows all the completed checklists that are waiting for manager’s review.
- Select the checklist you want to sign off on.
- Hover on the right side of the selected checklist to show the selection menu.
- Click on the “Sign Off Checklist” icon.
- Enter a remark, if any, on the checklist.
- Once done, click on “Ok” to save the changes.
