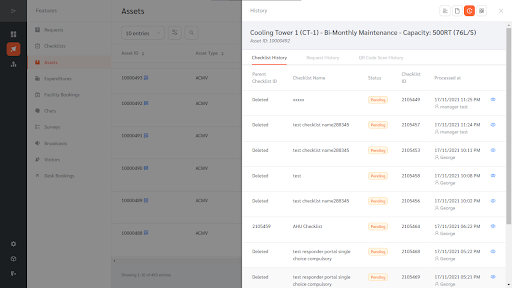
The FacilityBot Assets feature enables easy importing of asset information. Once imported, asset information including the asset maintenance history can be tracked. The maintenance history can also be accessed simply by scanning a QR code linked to the asset.
Creating a New Asset Type
- Log in to FacilityBot
- Go to Features and select “Assets”
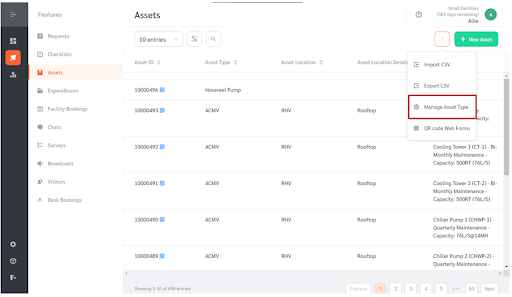
- Click on the 3 vertical dots menu located on the upper right and select “Manage Asset Type” A new page will appear where you can configure the Asset Type.
- Click on the + New Asset Type. An editing panel will appear. Give your asset category a name.
- Once done, click on “Ok” to save the changes.
(Note: Asset types can be edited using the pen icon or deleted using the minus icon located beside the asset type name.)
Creating a New Asset
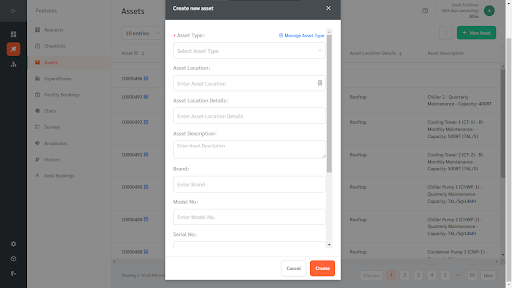
- To create a new asset, click on the + New Asset button
- An editing panel will appear. Here, you can select an asset type, enter the necessary information including the asset location, location detail, and asset description.
- You can also input the equipment brand, model no., serial no., purchase date, purchase price, and warranty expiry date.
- Once done, click the “Create” button to save the changes.
Importing Assets from CSV
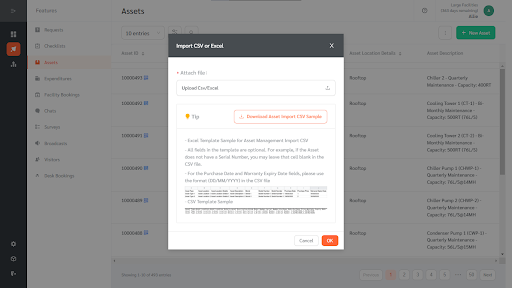
- You also have the option to import assets from CSV. To do this, click on the 3 vertical dots menu located on the upper right.
- Click on the “Import CSV”
- An editing panel will appear where you can upload a CSV or Excel File.
(Note: You can download the Asset Import CSV Template as a guide)
Managing Assets
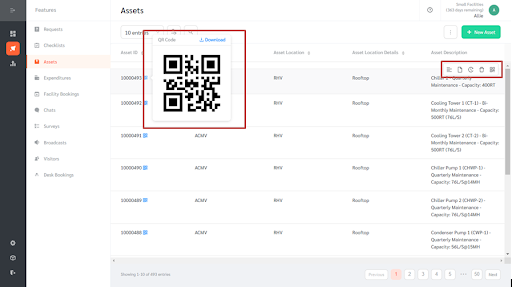
- Once the asset information is entered, the system generates a unique Asset ID QR code that is linked to the specific asset. Once a responder scans this Asset ID QR code using the FacilityBot Mobile App, the asset details can be viewed including the fault reports and preventive maintenance checklists linked to that asset.
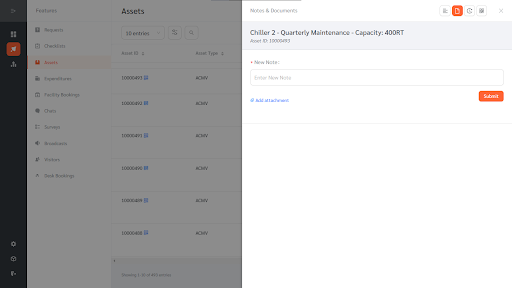
Adding Notes and Documents to the Asset
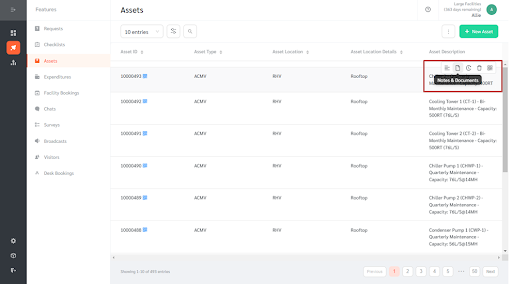
- Notes and documents can be attached to the assets. To do this, hover on the asset selection menu on the right and click on “Notes and Documents”
- A panel will appear on the right. Here, you can enter notes in the “New Notes” field.
- Attachments can be added by clicking on the “Add attachment” button. Once clicked, a new page will appear where you can select the file you want to add.