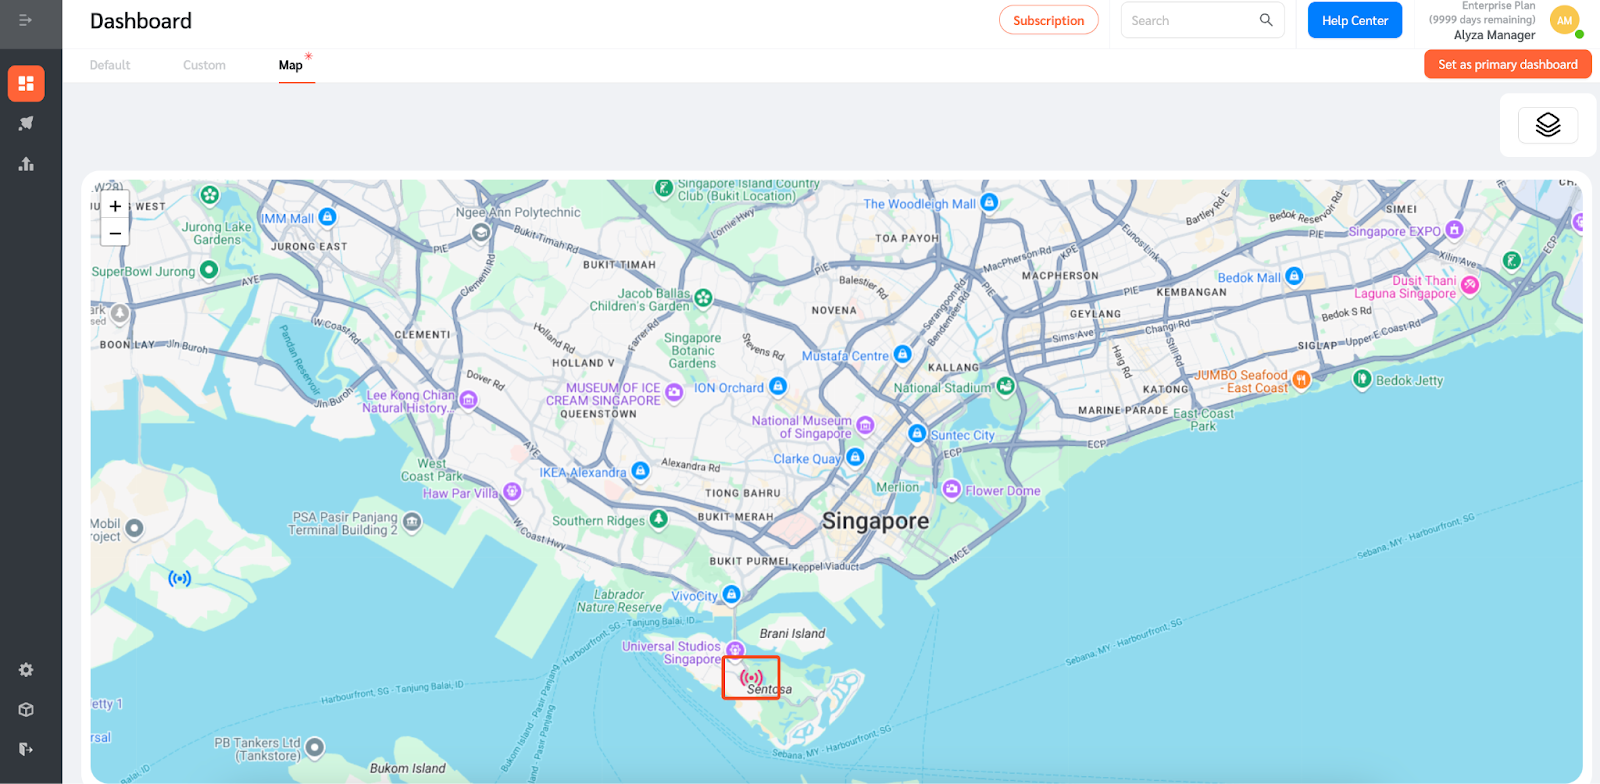
Some users may have sensors deployed in multiple locations. Facilitybot allows users to add a sensor layer to the map dashboard. The layer shows sensors that have latitude and longitude coordinates in the map.
- Log in to the Facilitybot Web Portal.
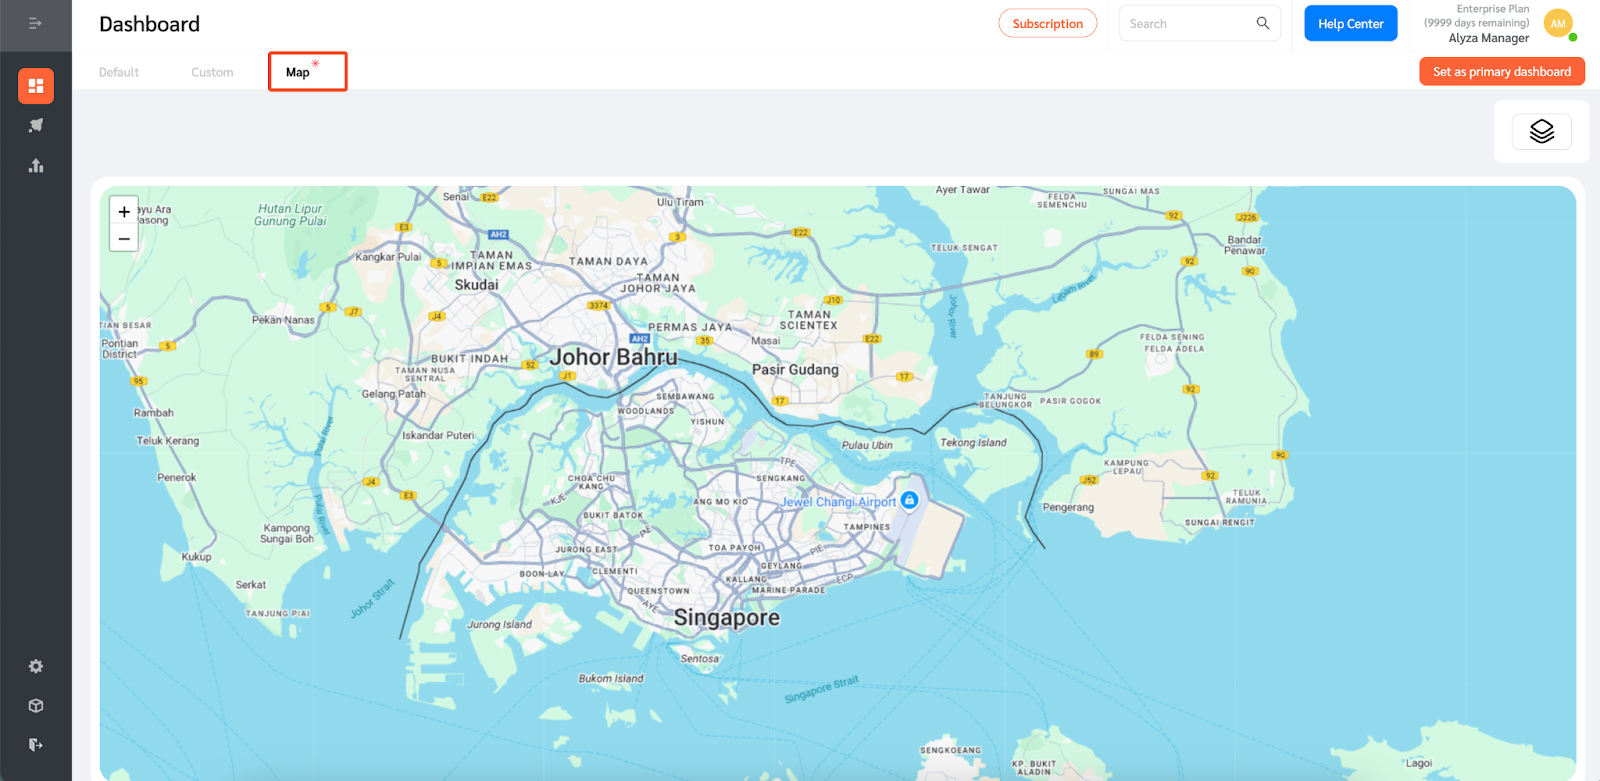
- Go to the dashboard page then select “Map.”
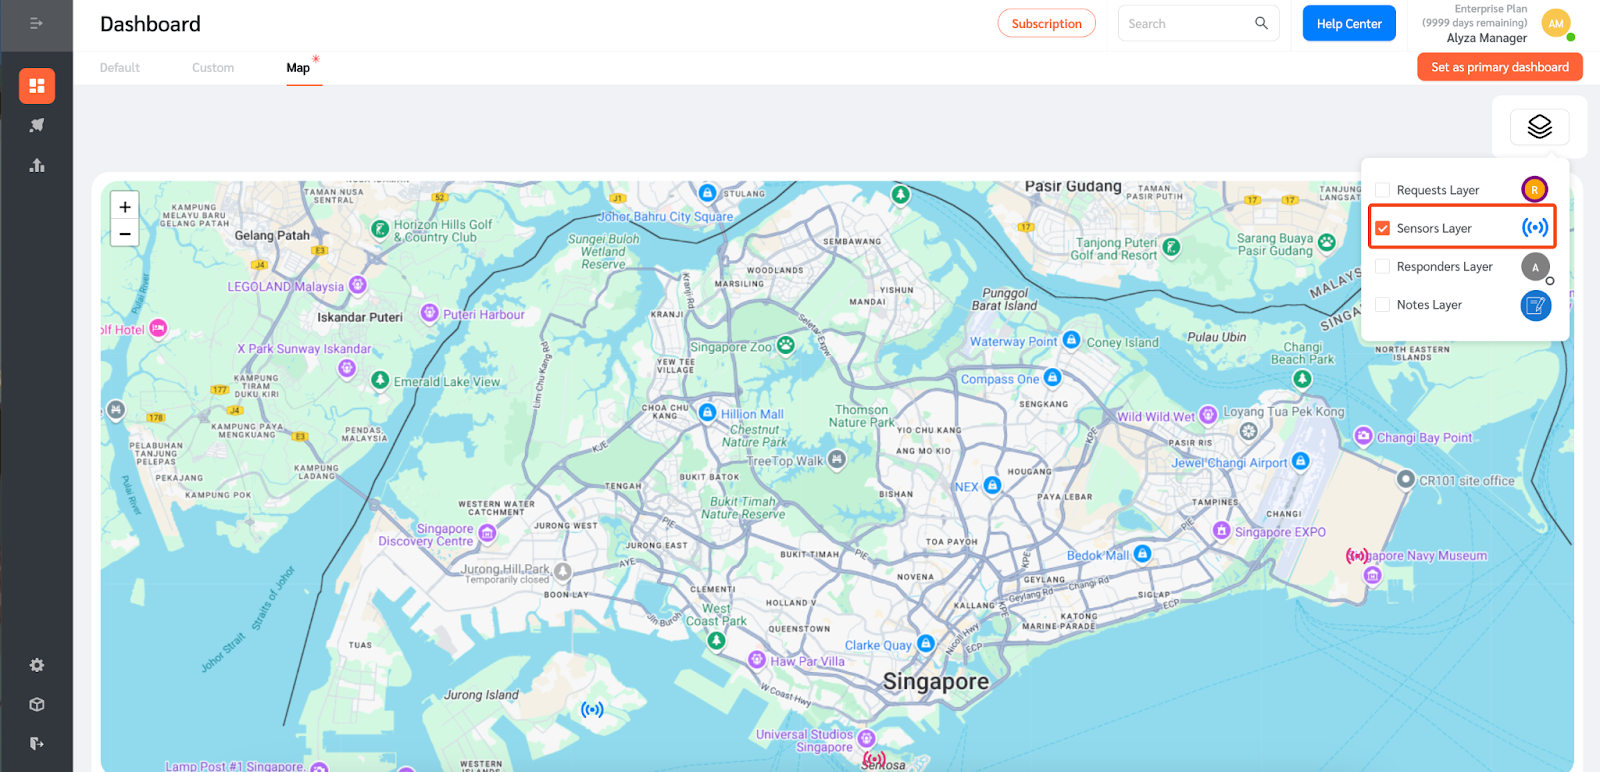
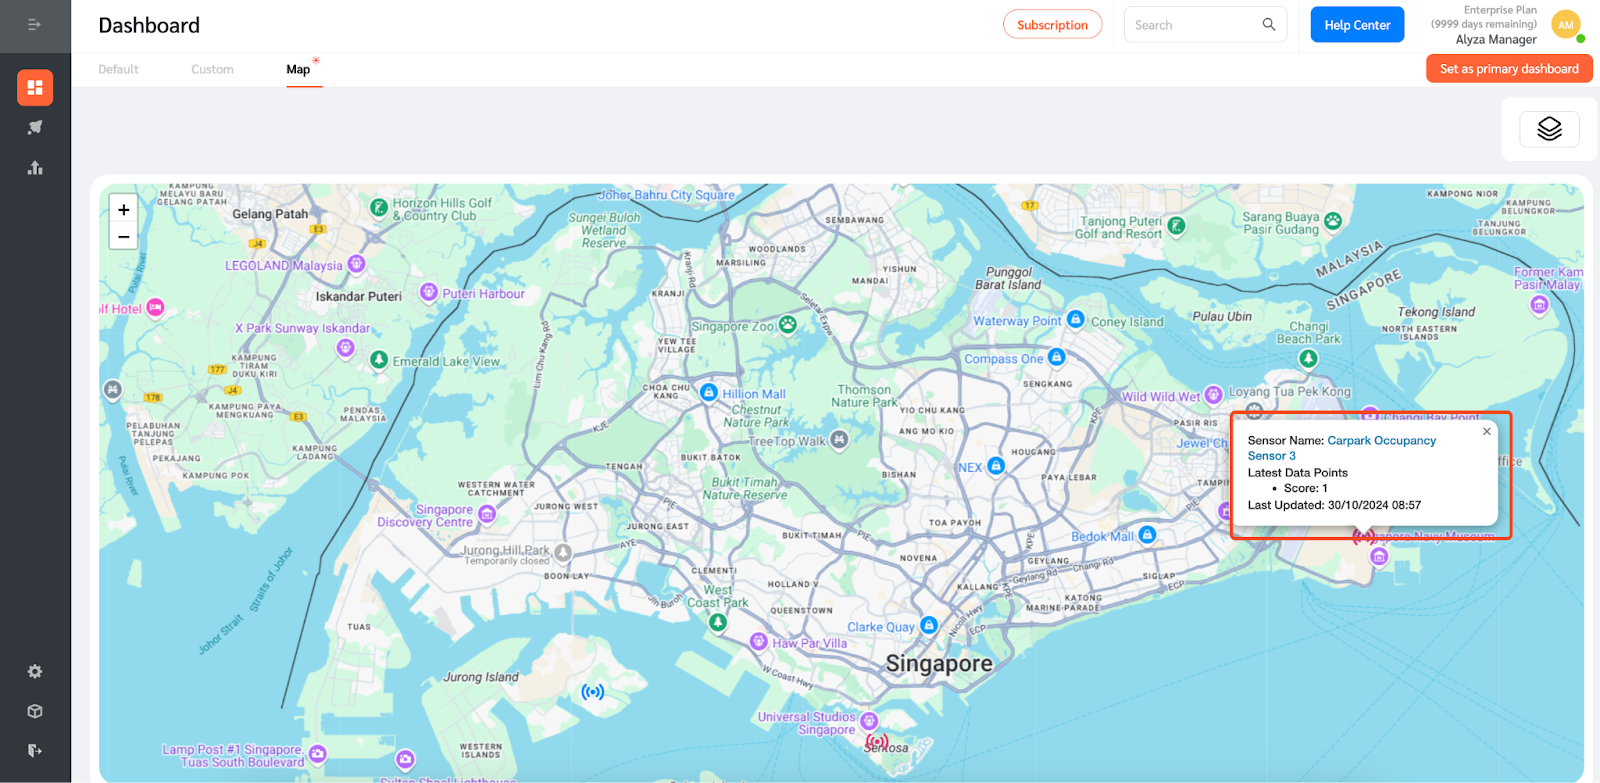
- Check the box to show sensors on the map.
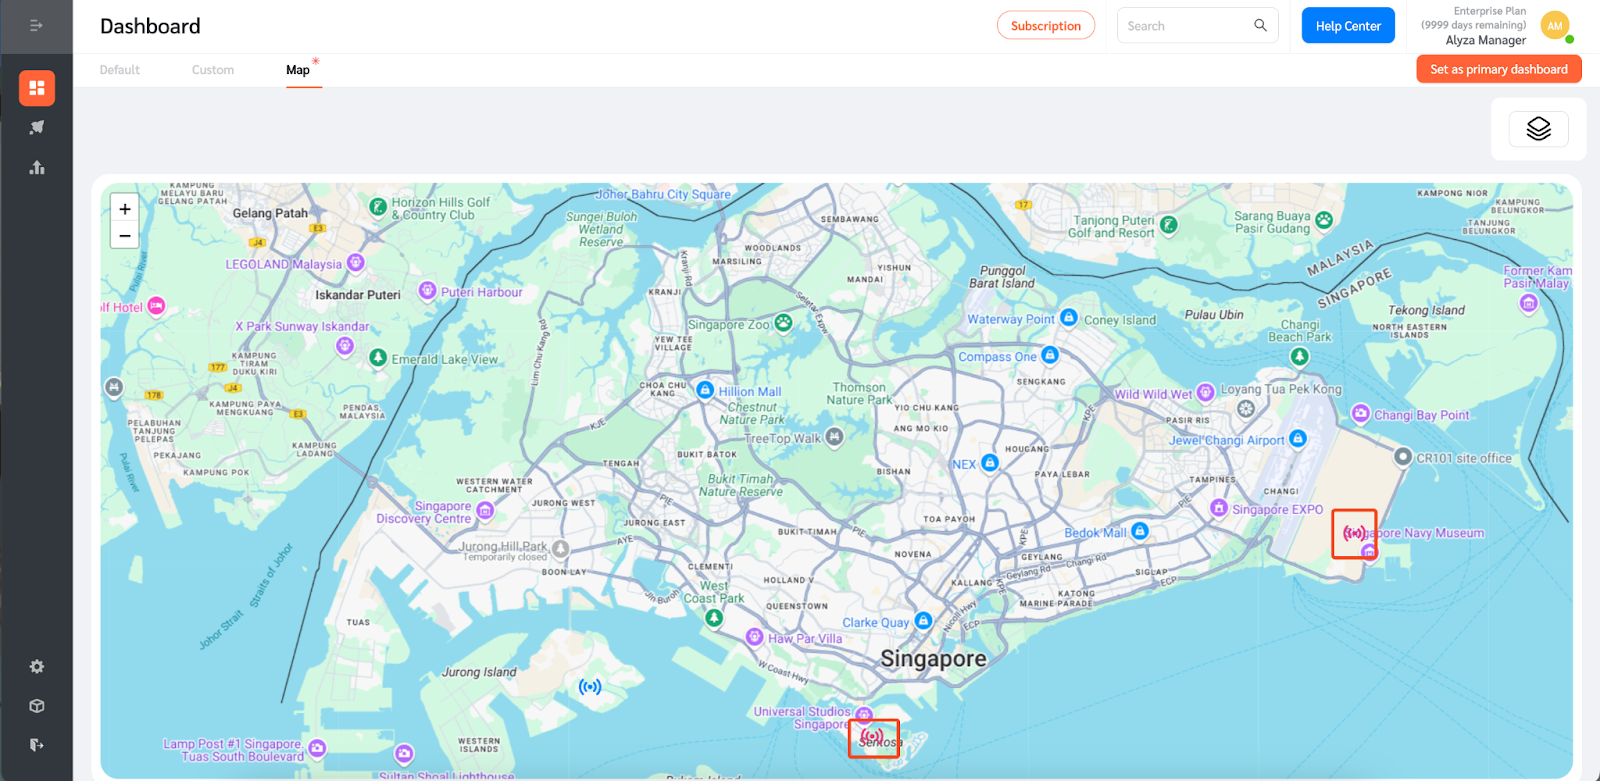
- Once checked, users can see where the sensors have been placed on the map.
Note: Only sensors which have latitude and longitude coordinates configured will be shown on the map.
- Click on the sensor icon to view additional details, including the name of the sensor, the latest data points, and the date and time when the sensor was last updated.
Configuring Sensor Coordinates and Conditions to Appear on the Map
- To configure the sensor latitude and longitude so that it will appear on the map dashboard, go to “Integrations” → “Sensors.”
- Create a new sensor or select from the previously created sensors.
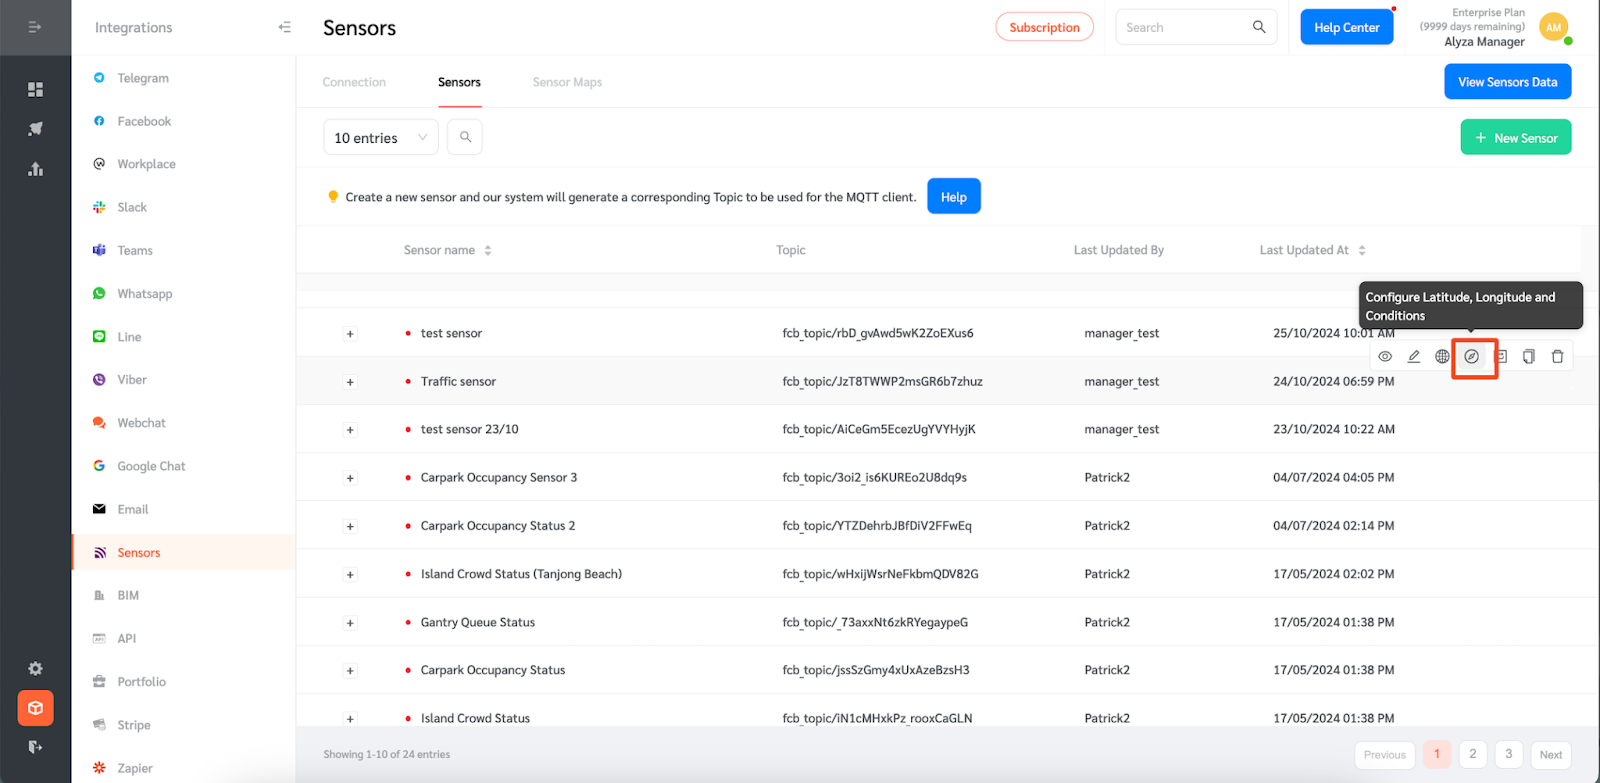
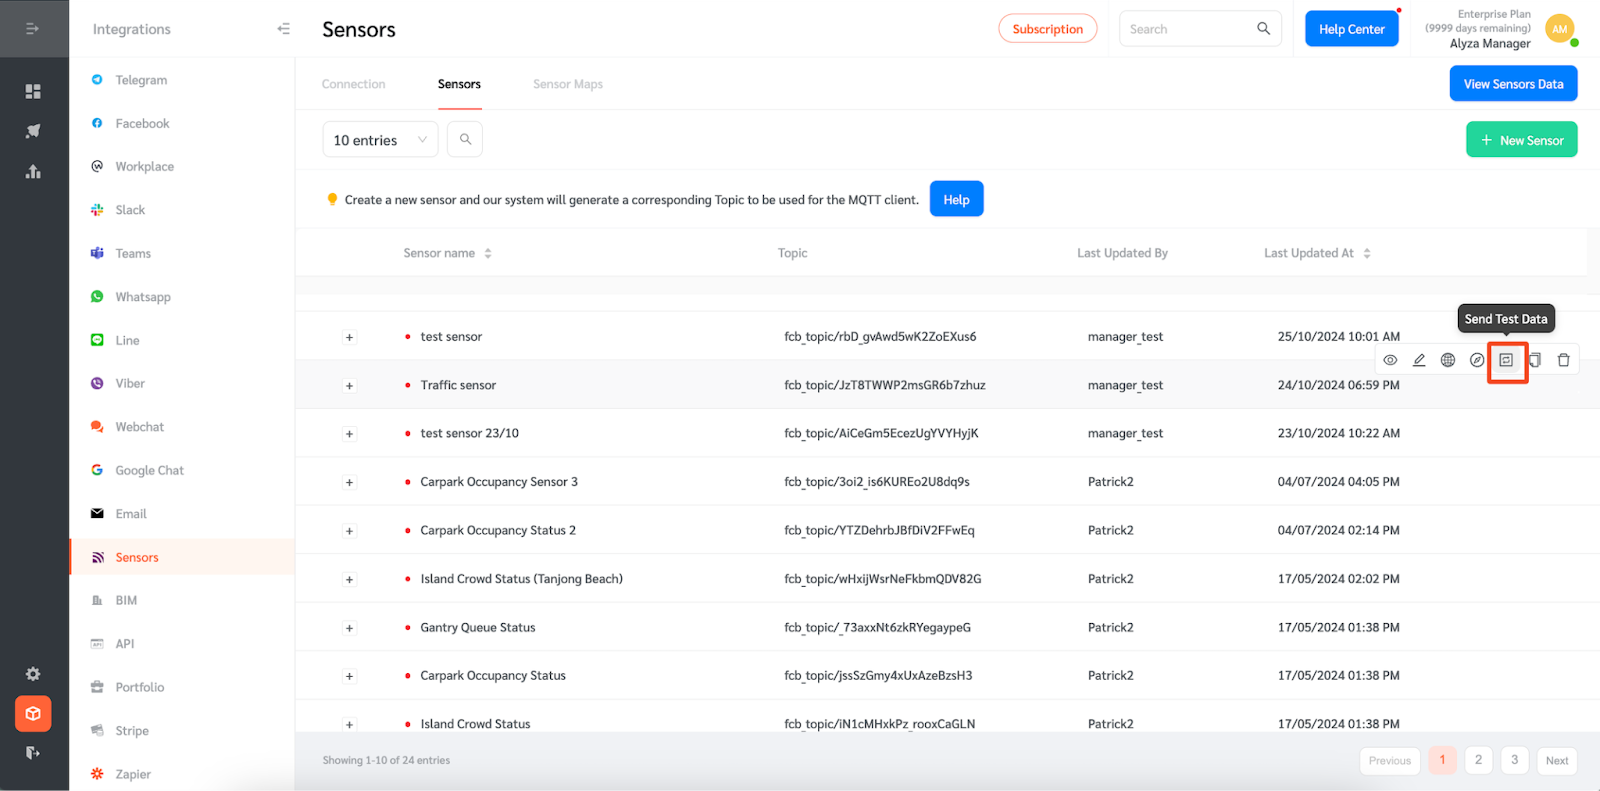
- Hover on the sensor and click on this icon to configure the coordinates and conditions of the sensor.
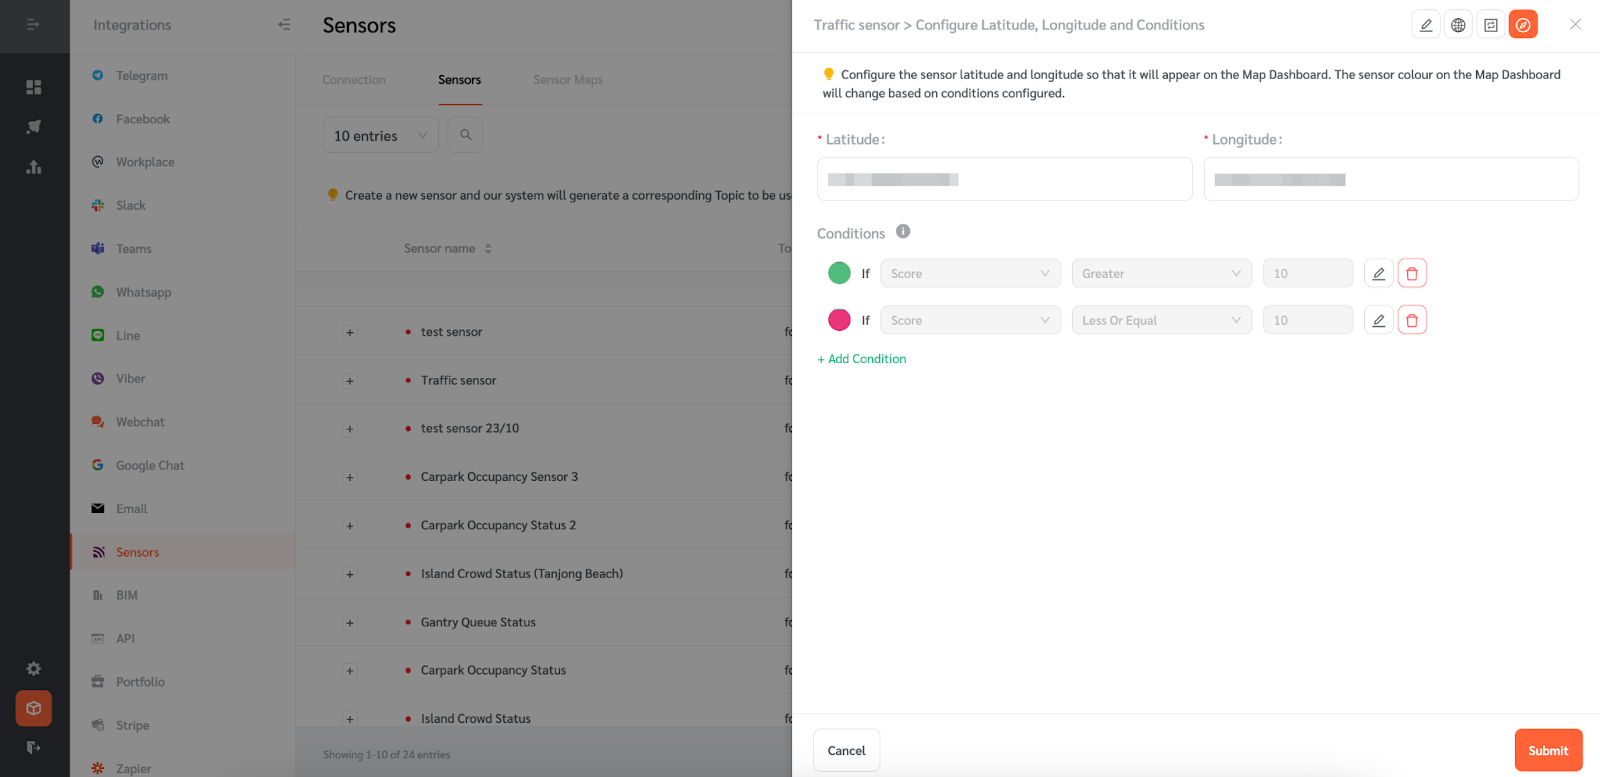
- A side panel will appear where you can enter the longitude and latitude.
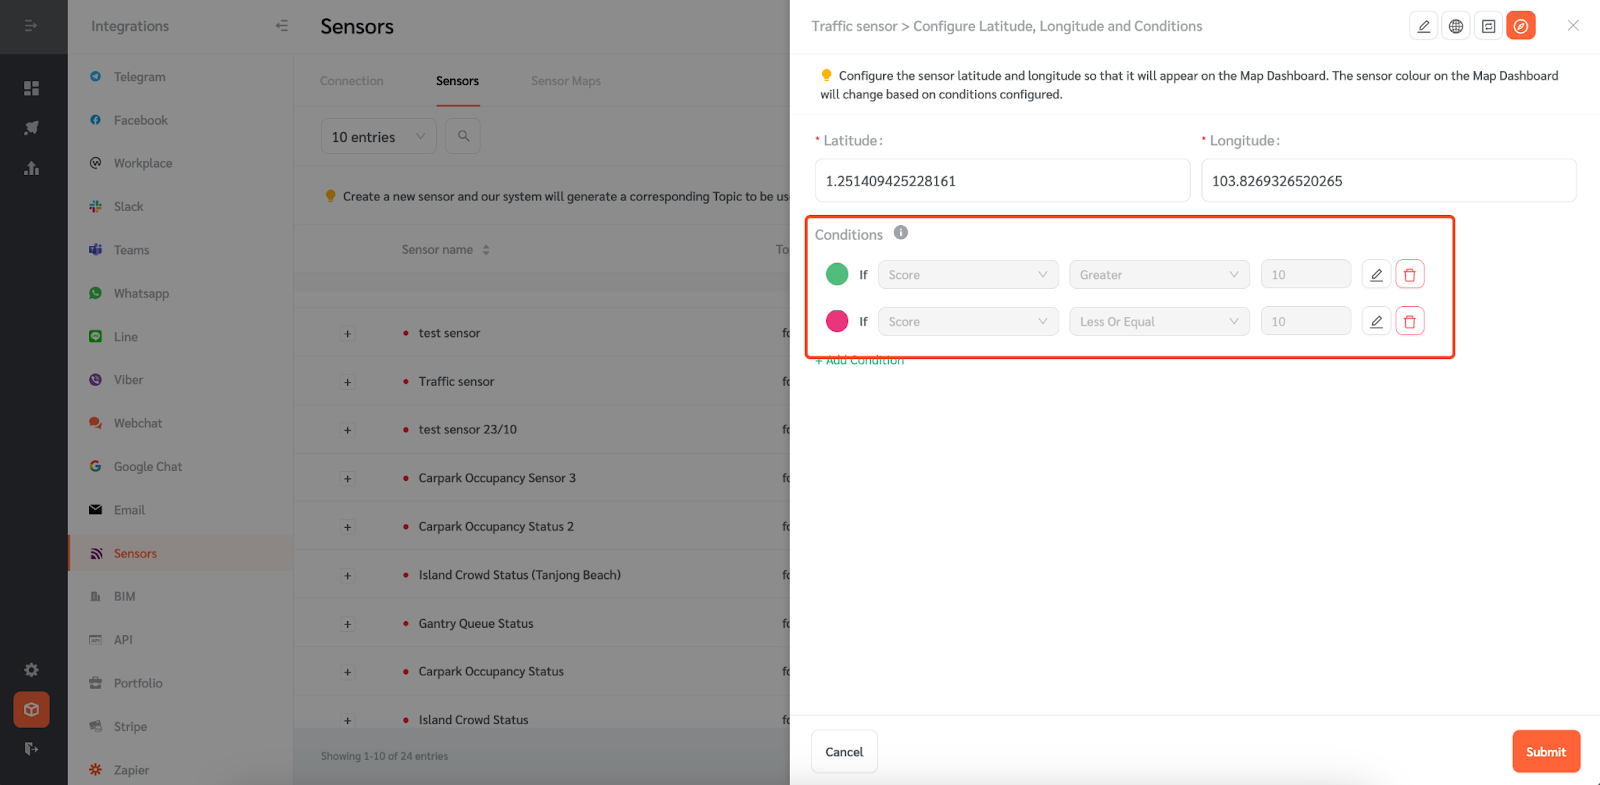
- You can also set the conditions for the sensor. The sensor colour on the Map Dashboard will change based on the conditions configured.
- Set different sensor colours based on sensor parameter conditions. For example, based on the conditions set, the sensor will appear green if the score is greater than “10” and red if the score is less than or equal to “10.”
- Note that if there are conflicting conditions, the condition on top will take precedence.
Sending Test Data
- To send test data, click on this icon.
- Since the test data is higher than “10,” the sensor appears green on the map dashboard.
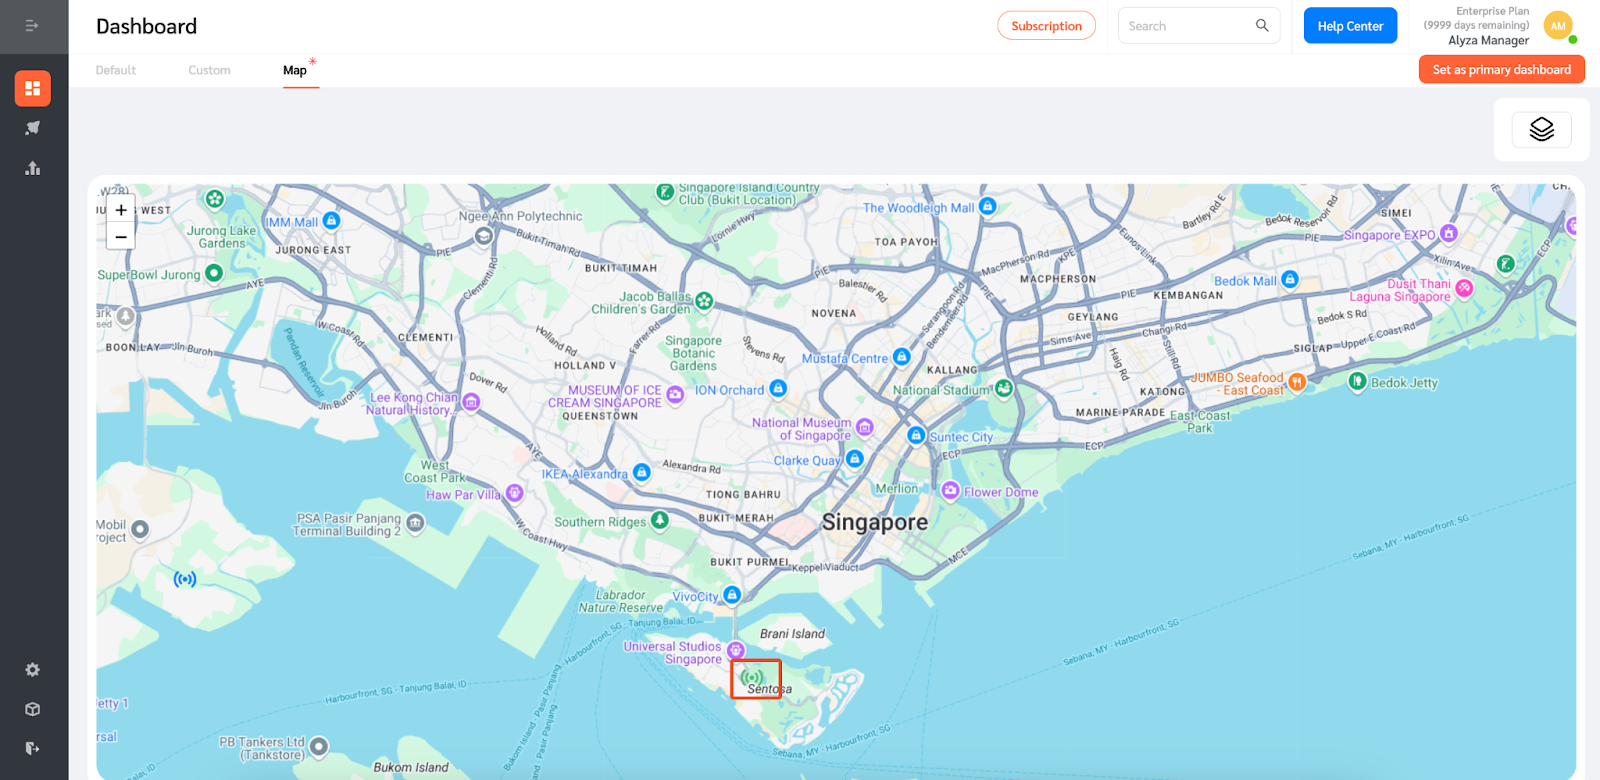
- Since the test data is less than “10,” the sensor appears red on the map dashboard.
