Organizations incur expenses as part of day-to-day operations in procuring goods and services from other parties. These expenditures often require approval. FacilityBot provides for expenditures to be electronically recorded, together with supporting documents, and sent for approval. The system logs all expenditures created and sent through it.
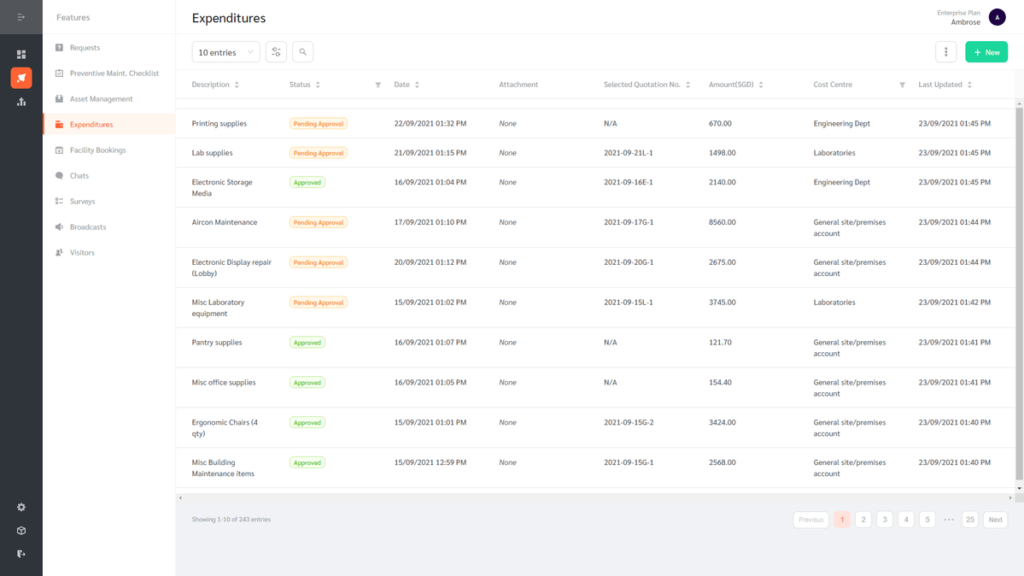
(Note: The table can be customized or searched using the row of options, below the “Expenditures” title, sorted by clicking the table headers, or filtered using the available filter icons on respective headers.)
How to Create a New Cost Centre or Expenditure
Create/Edit a Cost Centre
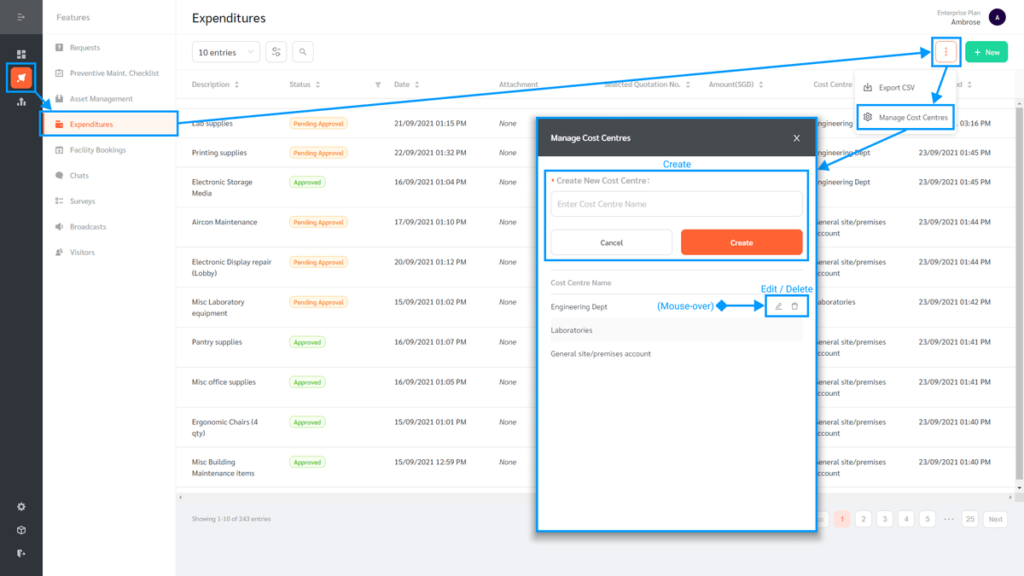
- Log into FacilityBot.
- Open the “Features” menu from the left icons, then select “Expenditures”.
- Go to the “Additional Options” menu (triple dots at the far right next to “+New”) and select “Manage Cost Centres”. A floating window will appear to create or edit a Cost Centre.
- Create a new Cost Centre by giving it a name, then clicking the “Create” button. The new Cost Centre will appear in the list below.
- Edit an existing Cost Centre using the “pencil” icon that appears on mouse-over of the Cost Centre, or delete it using the “dustbin” icon.
- Press the “X” icon at the top right to close the window and go back to the main Expenditures page.
Create a New Expenditure
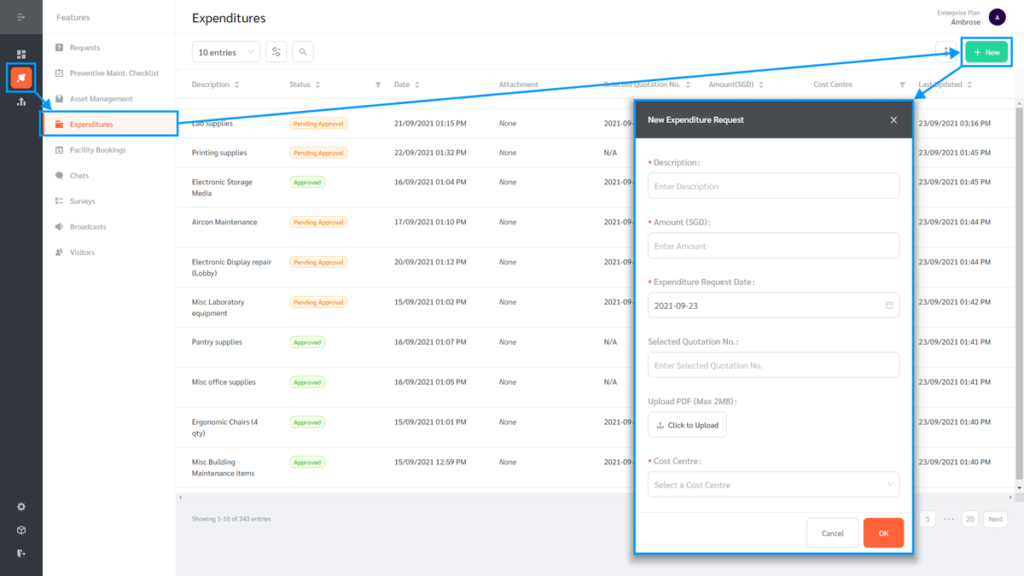
- Log into FacilityBot.
- Open the “Features” menu from the left icons, then select “Expenditures”.
- Click the “+New” button on the far right to create a new Expenditure.
- Fill in the details of the Expenditure. Fields marked with an asterisk are mandatory.
- If necessary, upload an accompanying document(s) in PDF format under the Upload PDF section.
- Click “OK” to finish creating the new Expenditure.
How to Modify or Delete an Existing Expenditure
Edit or Delete an Existing Expenditure
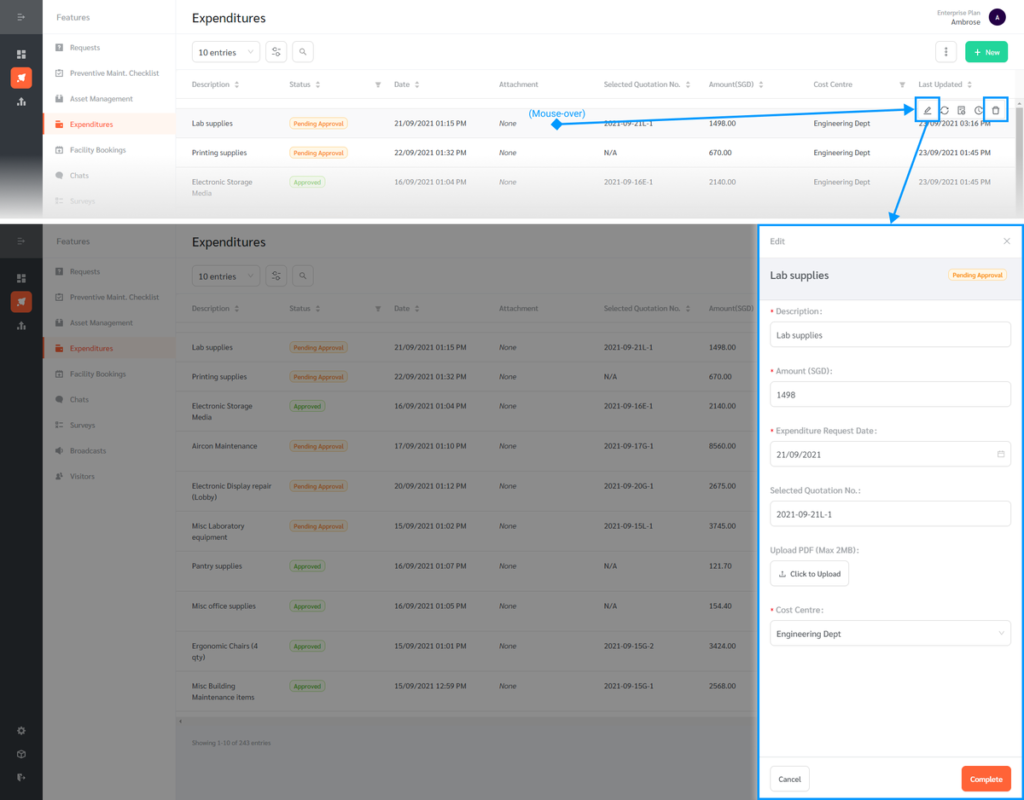
- Mouse-over the Expenditure to reveal floating icons at its far right.
- Modify the Expenditure: Click the “pencil” icon to edit the Expenditure. Delete the Expenditure: Click the “dustbin” icon to delete the Expenditure.
- Clicking the “pencil” icon will open a floating editing panel on the right.
- Make any changes or upload any documents (in PDF format) that are needed, then click the “Complete” button at the bottom right to save the changes.
Update Expenditure Status
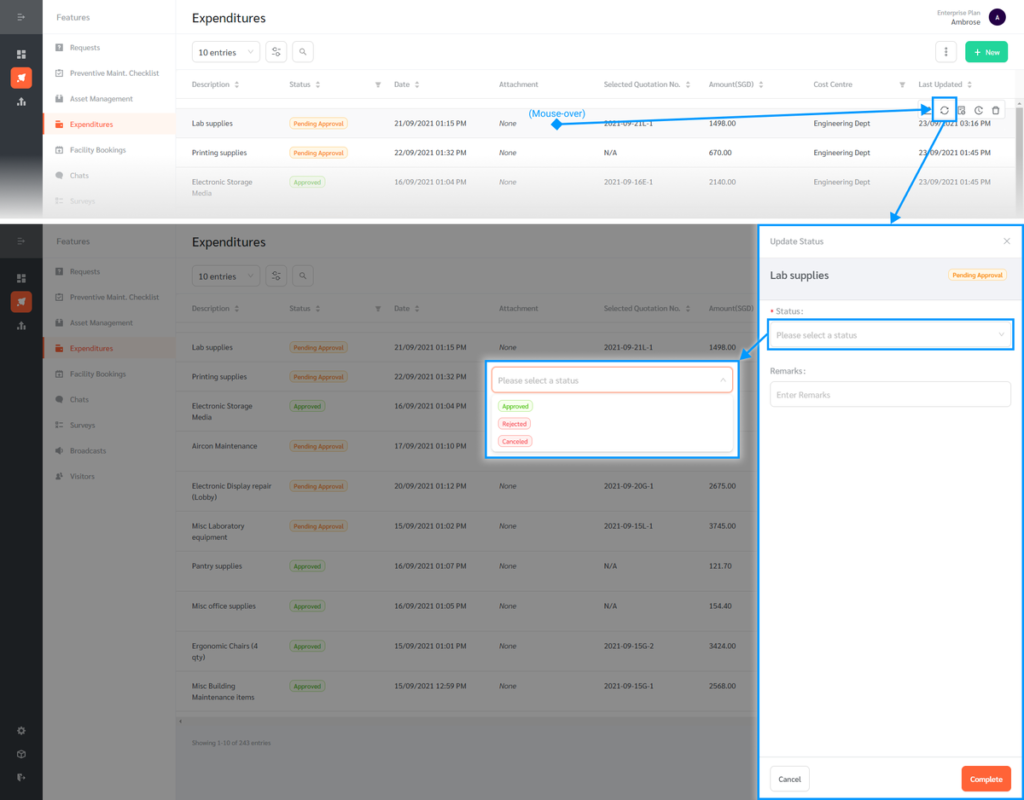
- Mouse-over the Expenditure to reveal floating icons at its far right.
- Click the “update” icon to update the status of the Expenditure.
- Select an appropriate status (“Approved”, “Rejected” or “Cancelled”) in the floating editing panel that appears. Enter any necessary remarks in the space provided below the status.
CAUTION: When one of these status updates is selected and saved, no further status updates can be made to the Expenditure. Status updates to “Approved”, “Rejected”, or “Cancelled” are permanent and cannot be reversed back to “Pending Approval”. Edits can no longer be made to the Expenditure either. This is for data integrity, so always be careful with status updates. - Click “Complete” at the bottom right to save the status update.
How to Send an Expenditure for Approval
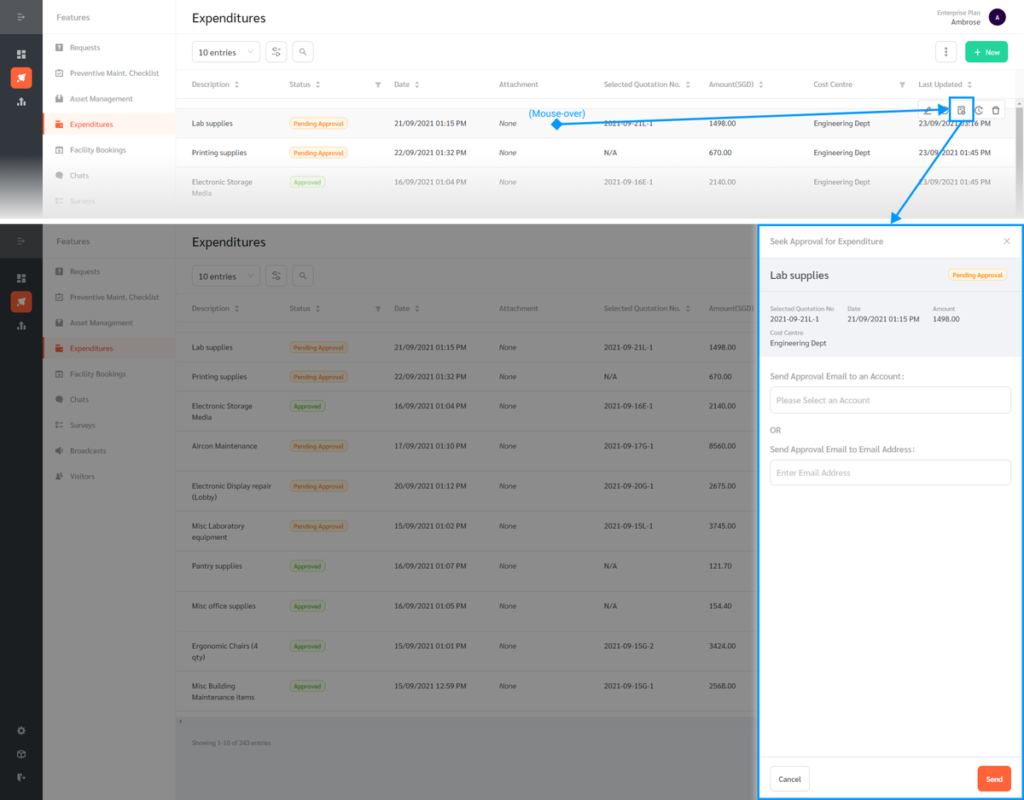
- Mouse-over the Expenditure to reveal floating icons at its far right.
- Click the “approval” icon to seek approval for the Expenditure.
- Review the summary details near the top of the floating panel that appears. (To make changes, refer to “Edit or Delete an Existing Expenditure”.)
- Use the “Send Approval Email to an Account” option to send the approval request to an account in the system, or use the “Send Approval Email to Email Address” option to send the approval request to a custom email.
CAUTION: Once an Expenditure is sent for approval, no further edits can be made to it and it can no longer be deleted. This action is permanent and cannot be reversed. The approver can still reject the Expenditure in case it needs changes. - Click the “Send” button at the bottom right to send the approval request. The approver will receive an email with options to Approve or Reject the expenditure.
How to Review the History of an Expenditure
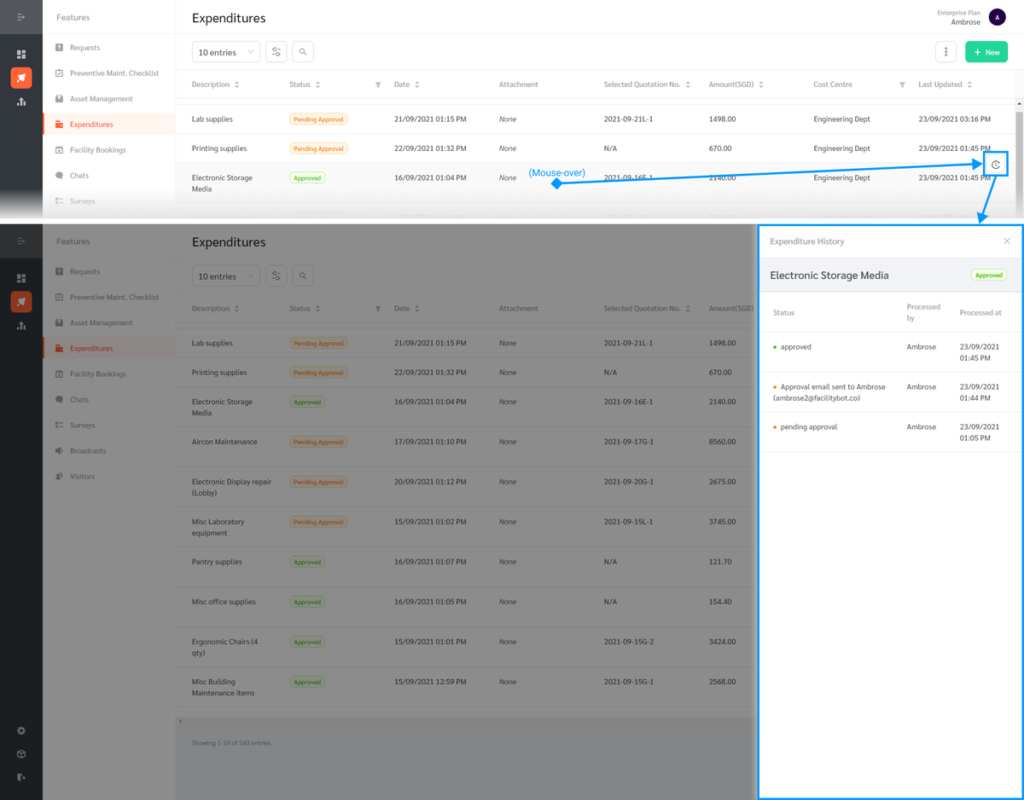
- Mouse-over the Expenditure to reveal floating icons at its far right.
- Click the “history” icon to see all actions that have been performed on the Expenditure. The log shows when the Expenditure was first submitted as “pending approval” when any approval requests were sent and to whom, and any subsequent status updates.
(Note: An approved example is used to show a complete approval history, but all Expenditures, approved or not, will have a history record.